Page History
...
- Start NPCEditor by starting the Virtual Human Toolkit launcher first and clicking on '<< Advanced' and then on 'Launch' in the NPCEditor row (that is under the 'Agents' section.
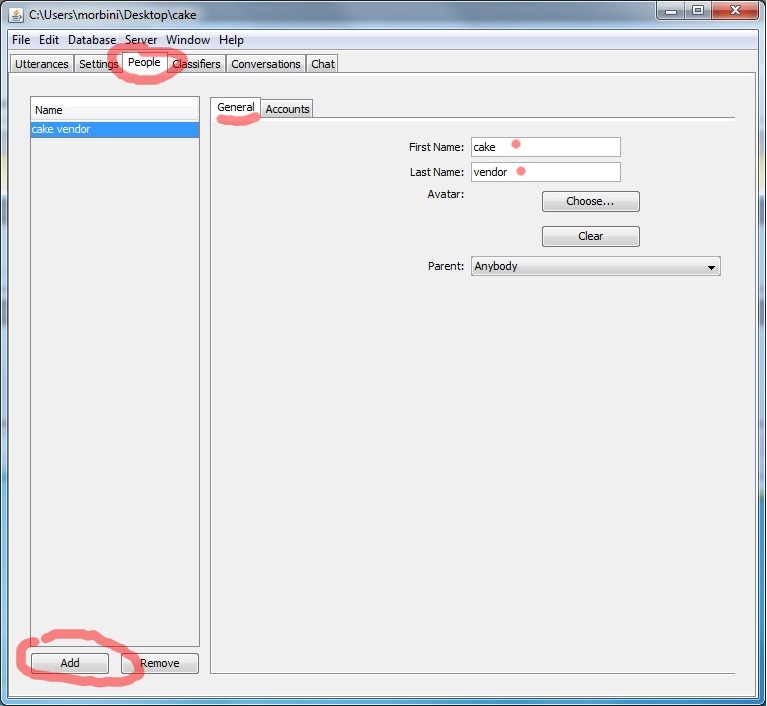
- Select the menu 'File->New' to start creating a new virtual agent. Save it a 'cake.plist'.
- Create a new person called 'cake vendor' under the People tab. This 'person' will handle the initial greeting exchange. Each person created defines what NPCEditor calls a domain. Each domain is associated with a different classifier. A domain can work like a state in a dialog manager, we will see later how to define which utterances are defined in a particular domain and how changing domain (i.e. state) works. Make sure u set both 'first name' and 'last name'. If your domain/person is just one word, you can set the last name or the first name to be a space ot you can split the word into 2 parts, one for the first name and the other for the last name.
- :
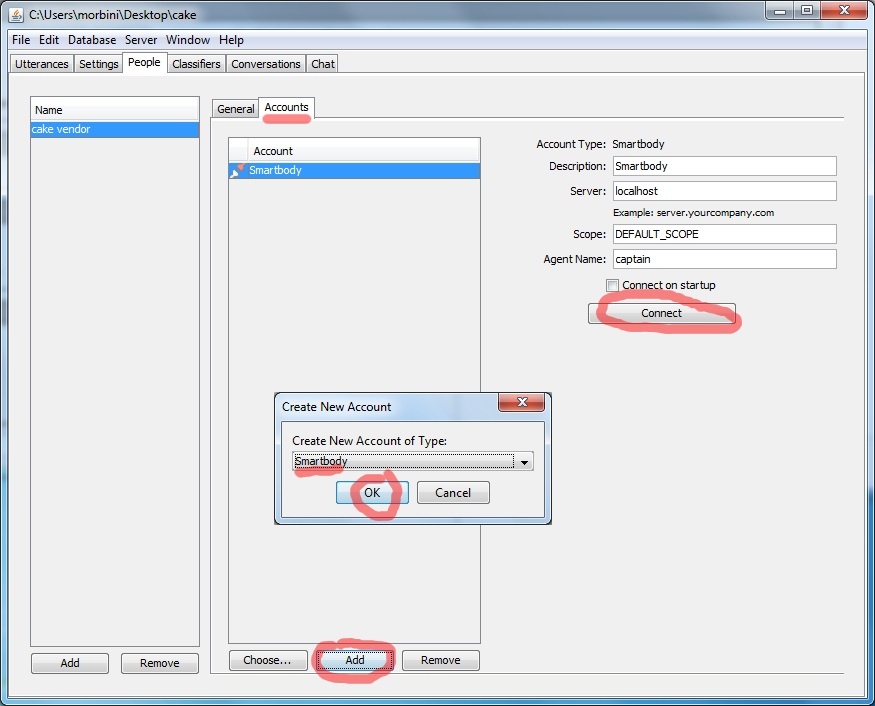
- Now define the connection NPCEditor uses to communicate with the rest of the Virtual Human Toolkit architecture. Select the 'Accounts' tab, then click on 'Add' and select 'Smarbody'. Test the connection by clicking on 'Connect': the button will change to 'Disconnect' and the row corresponding to the NPCEditor in the Launcher will become green. This should be defined once and associated only to one of the defined persons: the one that defines the initial domain.
 File__CreateConnection.png
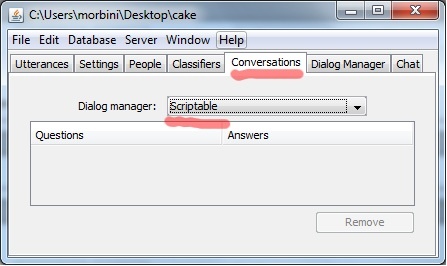
- Next select as type of dialog manager 'scriptable' in the 'Conversations' tab. A new 'Dialog Manager' tab next to 'Conversations' will appear containing an initial script for a dialog manager. The script is written in Groovy and can be edited to suit your needs.
 File__SelectScriptable.png
- Set the parent property of 'cake vendor' to 'Anybody' (default value). This step defines an inheritance hierarchy among the various domains. In this case the 'cake vendor' domain inherits the utterances defined for the 'Anybody' domain.
- Create all the other persons defined in the dialog graph above: 'cavities', 'xylitol', 'diabetes', 'cake type', 'sponge cake flavor', 'cheese cake flavor'. Set the parent property of each of them to the 'Anybody' domain.
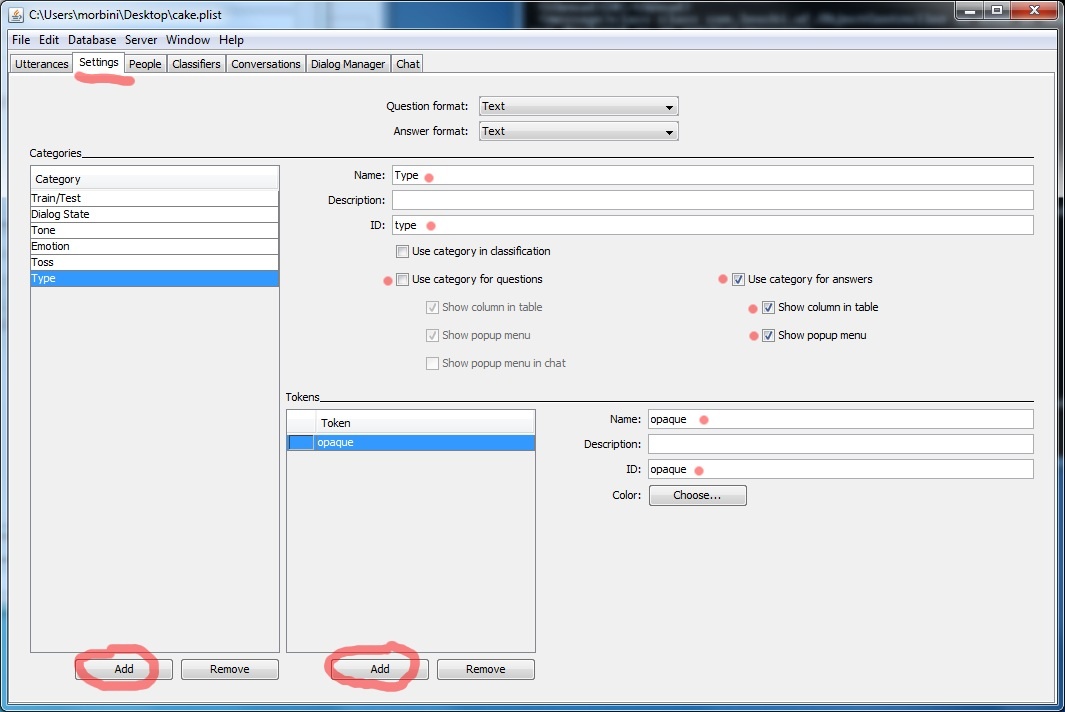
- Create a 'type' and 'speaker' category in the 'Setting' tab. The first is used by the default dialog manager script to handle off topic utterances from the user. The second (speaker) needs to be set for proper communication with the rest of the modules in Virtual Human Toolkit.
File__CreateTypeCat.png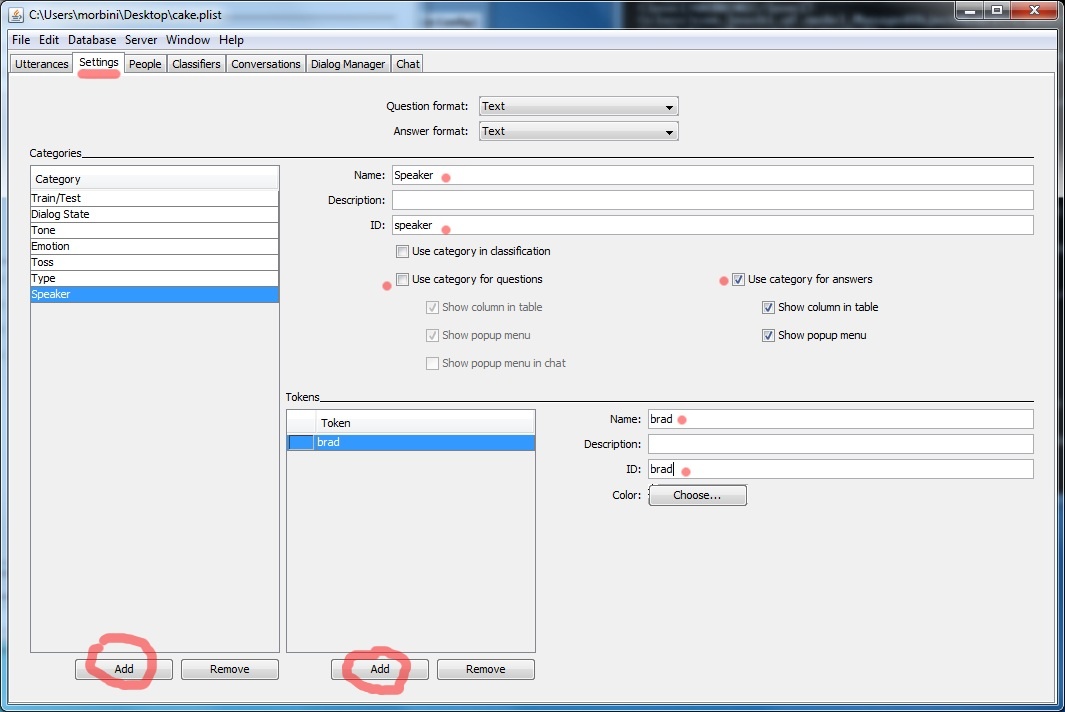 File__CreateSpeakerCat.png
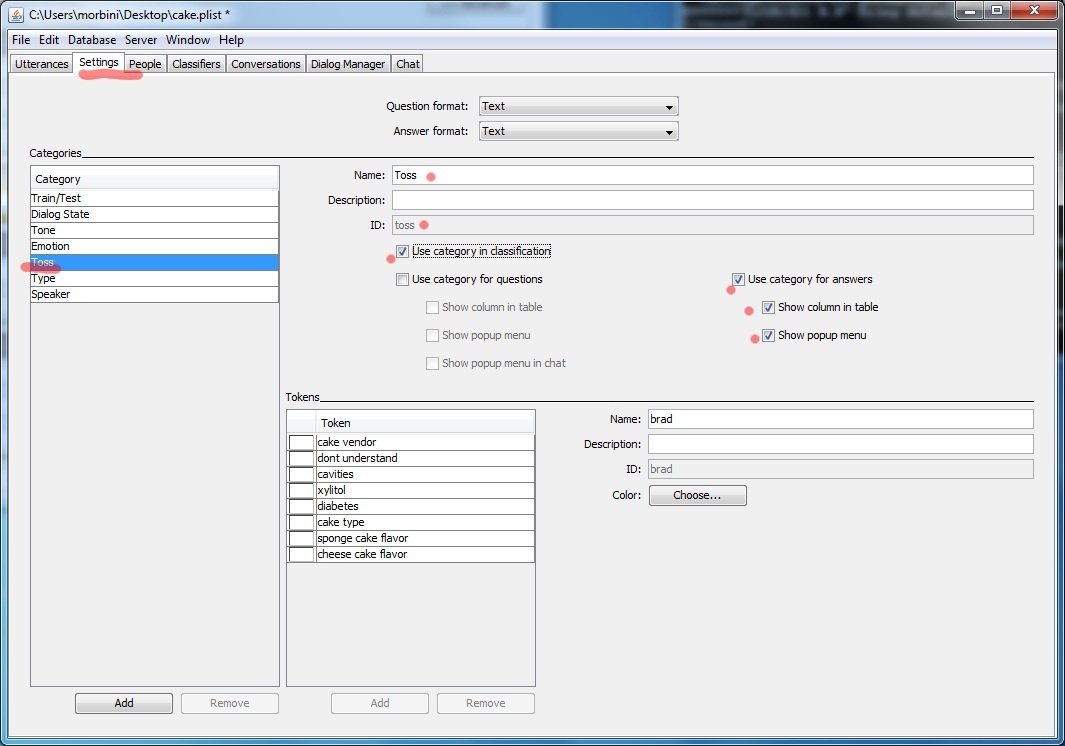
- Make sure the 'toss' category is set to be included in the answers and used by the classifier.
 File__SetTossCat.png
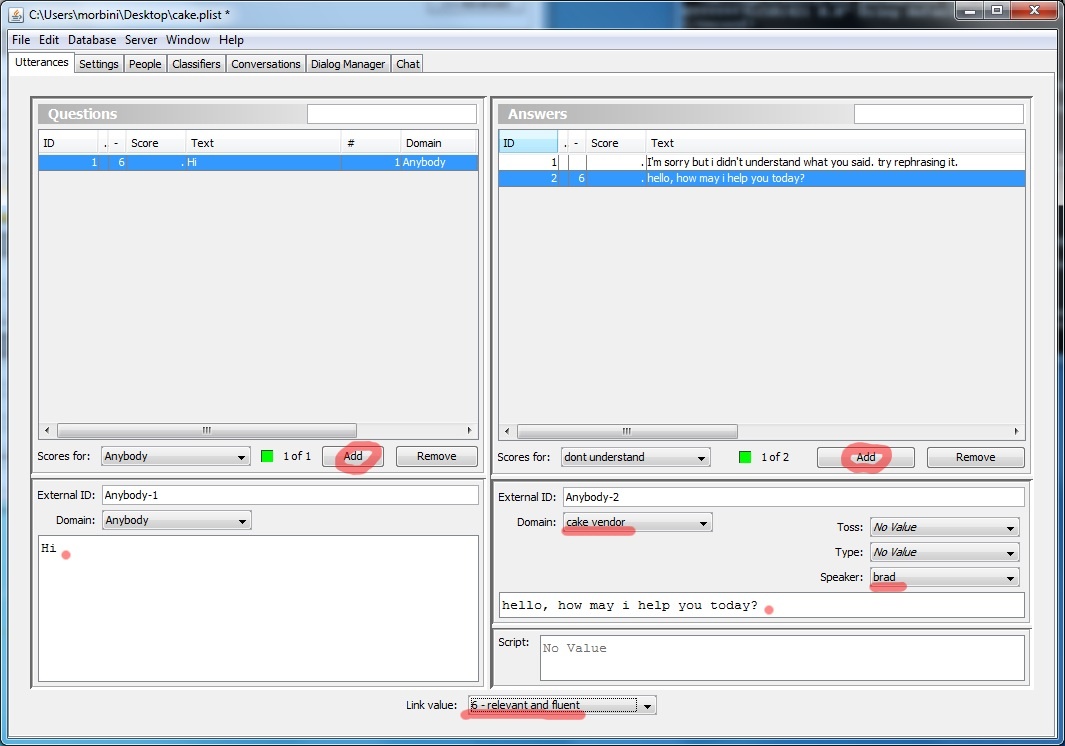
- The previous steps end the setup, from now on we will add the utterances we want the agent to understand and we will define the appropriate answers. To define the reply the agent will give when it doesn't understand what the user said; add a new answer and select the type to be 'opaque'. Then define an appropriate text (e.g. "i didn't understand what you said, try to rephrase it"). For all answers you want the agent to be able to speak and animate, set the speaker to 'brad'.
- Next add the various utterances. The first defines the agent's answer to the user's statement 'Hi'. Here leave the type of the answer unset (because it's not an answer to be associated with non understanding). Set the speaker to 'brad' as usual and the domain to 'cake vendor'. On the user pane (the left half) set the text to 'Hi'. Finally click on both newly added utterances (they both become blue) and then set the link strength to 6 to define that the one on the right should be the answer for the utterance on the left. Similarly do for adding the replies for 'thank you' and 'bye'.
 File__Utt1.png
- Now we will see how to make a change of state when the user says a particular utterance. We will change from 'cake vendor' to 'cavities' when the user says that s/he wants to get a cake from the agent. To do so, in addition to the setup done for the other utterances in the previous step, just set the toss property to the 'cavities' domain.
 File__Utt2.png
- Follow this procedure and complete all steps as represented in the dialog graph given at the beginning. You can see also the complete cake.plist file.
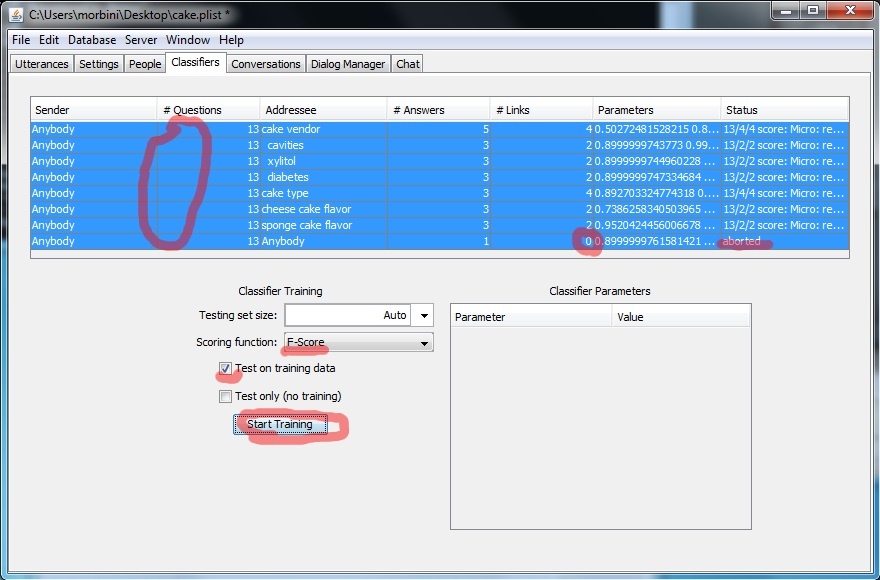
- Before running the example, remember to train the classifier. Select all the rows in the table in teh tab 'Classifiers'. Then check the box 'Test on training data' (because the training data is too small to be split) and then click on 'Start Training'. You can change the optimization criteria. Also, in this example, the Anybody classifier will fail because it contains no links to learn between user utterances and system answers.
 File__Train.png
- :If during the testing of the example, you see that the classifier returns multiple answers instead on just the correct one, you can adjust the threshold of that classifier by selecting the classifier in question and double-clicking the threshold displayed, as seen in this screen capture:
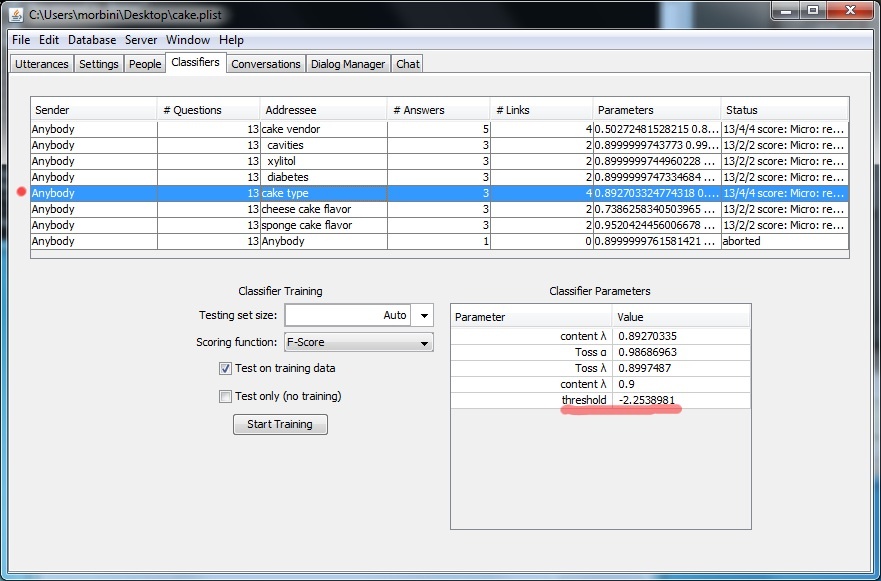 File__Threshold.png
Making The New Example The Default One
...
Overview
Content Tools
Activity