Page History
| Table of Contents |
|---|
Overview
In this This tutorial we will describe the steps will teach you how to create a new character using character using NPCEditor.
The character created in this example will be organized as follows:
- initial and final phase of exchange of greetings and thanks.
- after this, if the user states s/he wants to buy a cake, the agents will help the user buying the cake they want. This phase is structured as a series of yes/no or multiple choice questions the virtual agent asks the user. The answers the user provides will define the type of cake the agent will order for the user.
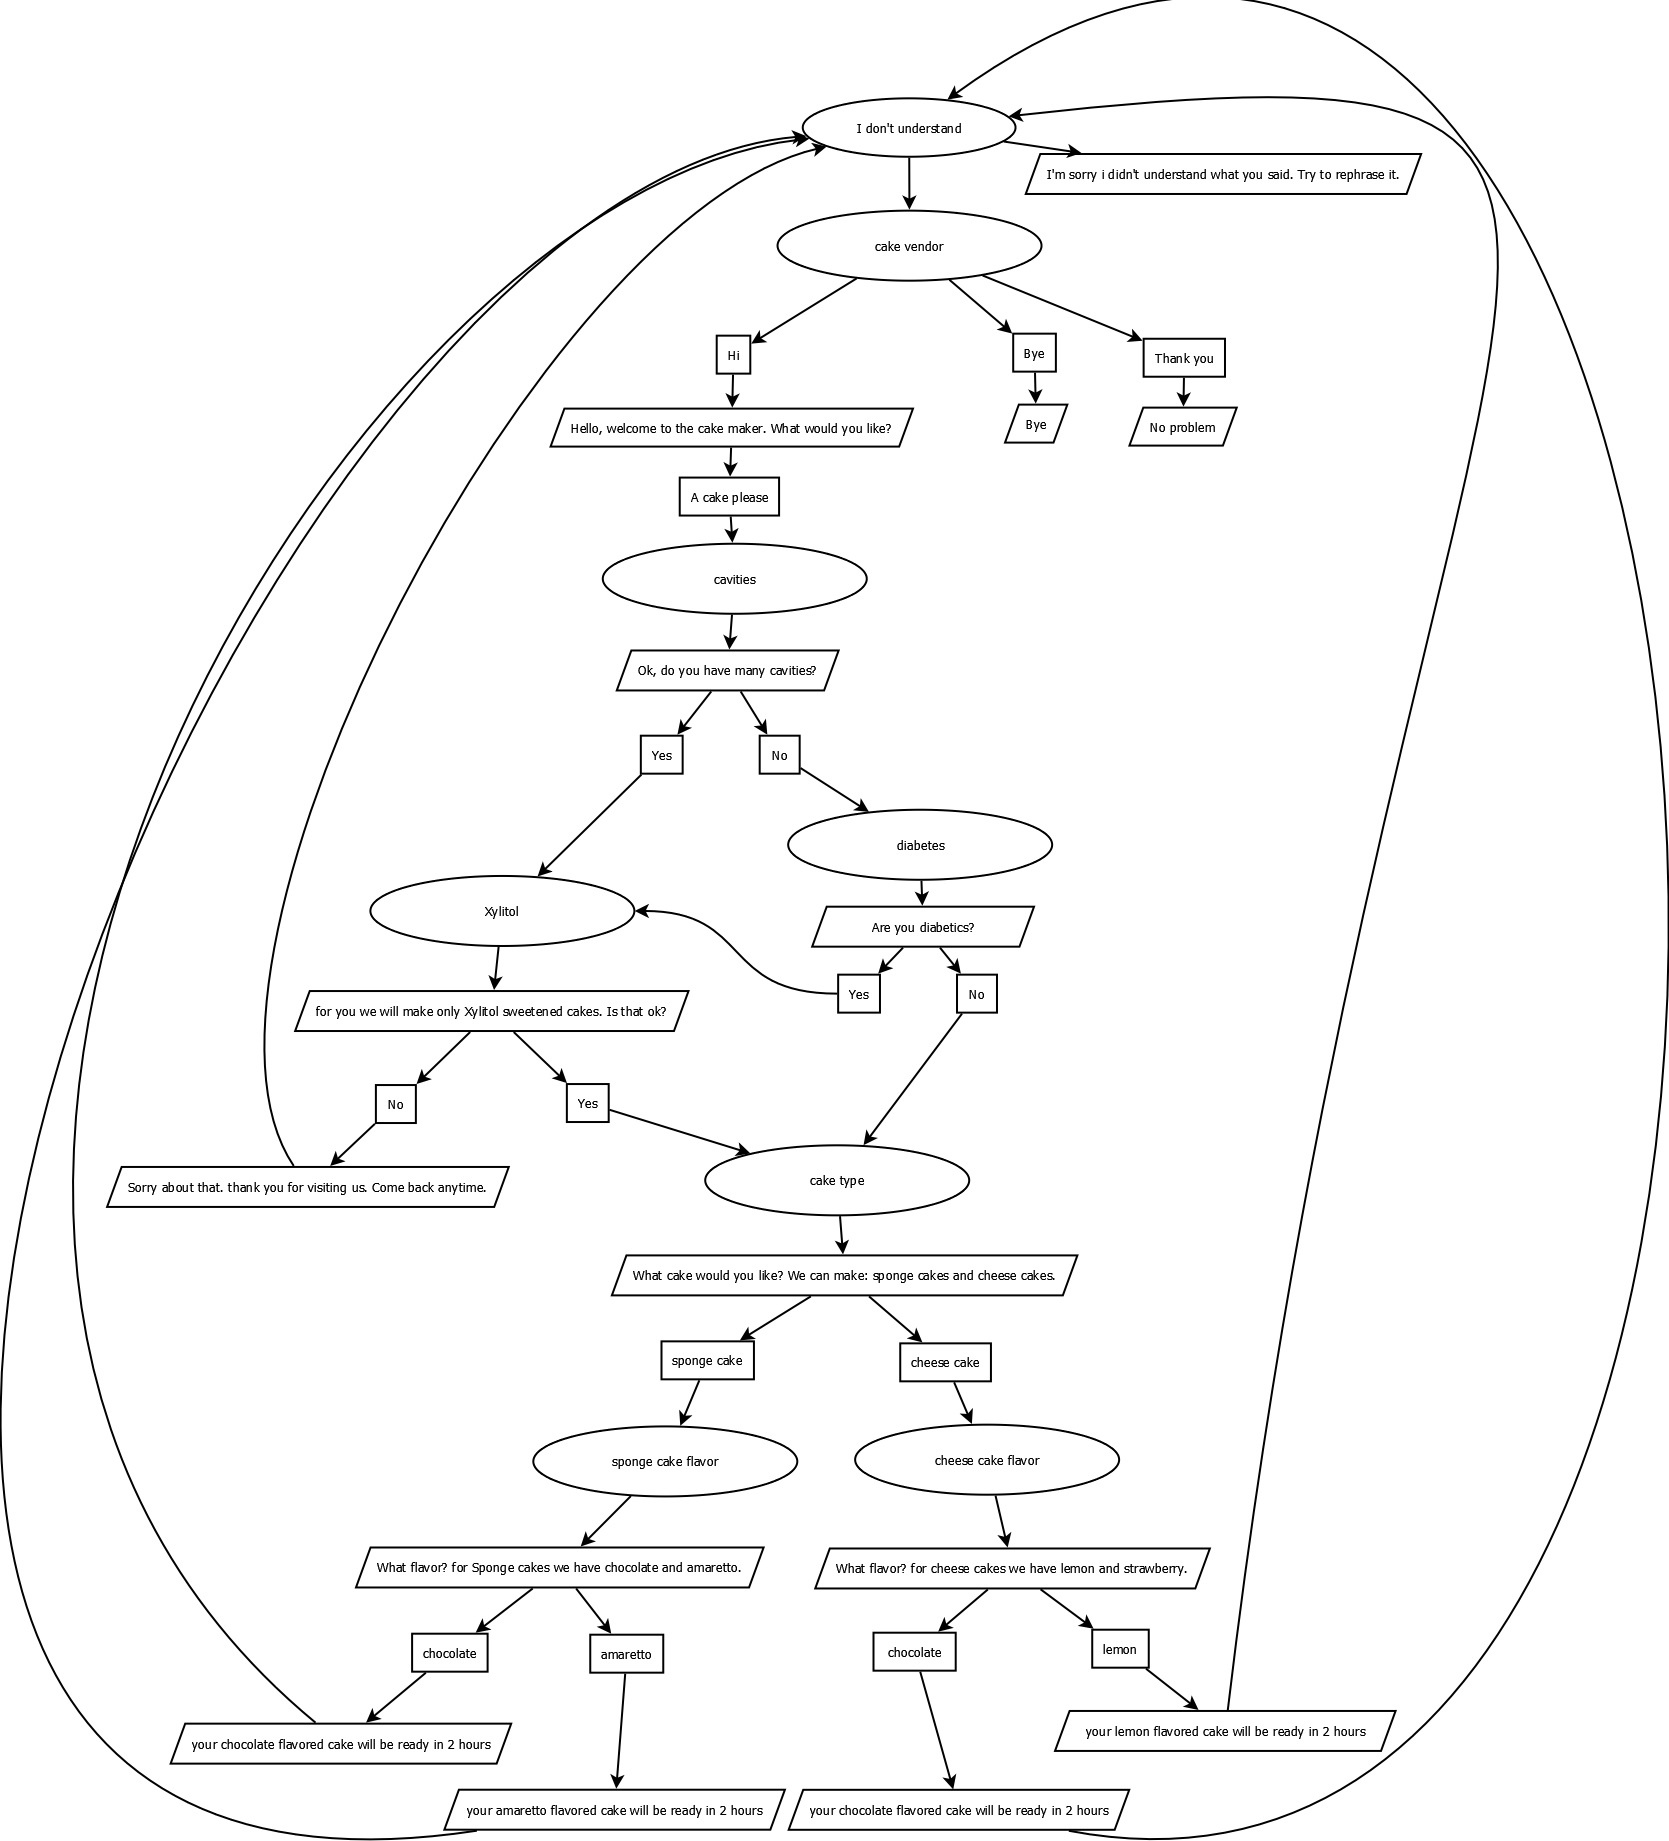
This is the dialog graph we will be creating:
Steps
greet the player and then prepare them a cake using a series of yes or no questions. This is the tutorial character's dialog graph:
NPCEditor stores data in the p-list format, similar to XML. These files contain the questions and answers for the character, as well as the links between them. There is also an accounts plist required to connect a character to other modules, which is stored in %AppData%\Roaming\NPCEditor\people\
Preparation
- Get a copy of NPCEditor. You can check out a binary out from SVN, or even simpler, grab the latest version of the Virtual Human Toolkit. The Toolkit includes NPCEditor, along with other tools to generate your own virtual human.
- To run NPCEditor, find the
run.batin your NPCEditor install, or from the Toolkit, run the Virtual Human Toolkit Launcher and expand the '<< Advanced' options, then click Start NPCEditor by starting the Virtual Human Toolkit launcher first and clicking on '<< Advanced' and then on 'Launch' in the NPCEditor row (that is under in the 'Agents' section. - Before you begin, it may be worth making some NPCEditor quality of life improvements. In NPCEditor's Preferences, turn off "
Save files automatically if application is idle for 15 seconds."
Creating a New Character
- Select Select the menu '
File->New' to start creating create a new virtual agentplist. Save it a as 'cake.plist'. - Create
Inside
calledcake.plist, select the People tab and create a new personnamed '
under the People tabcake vendor'.This
'person
'will handle the initial greeting exchange.
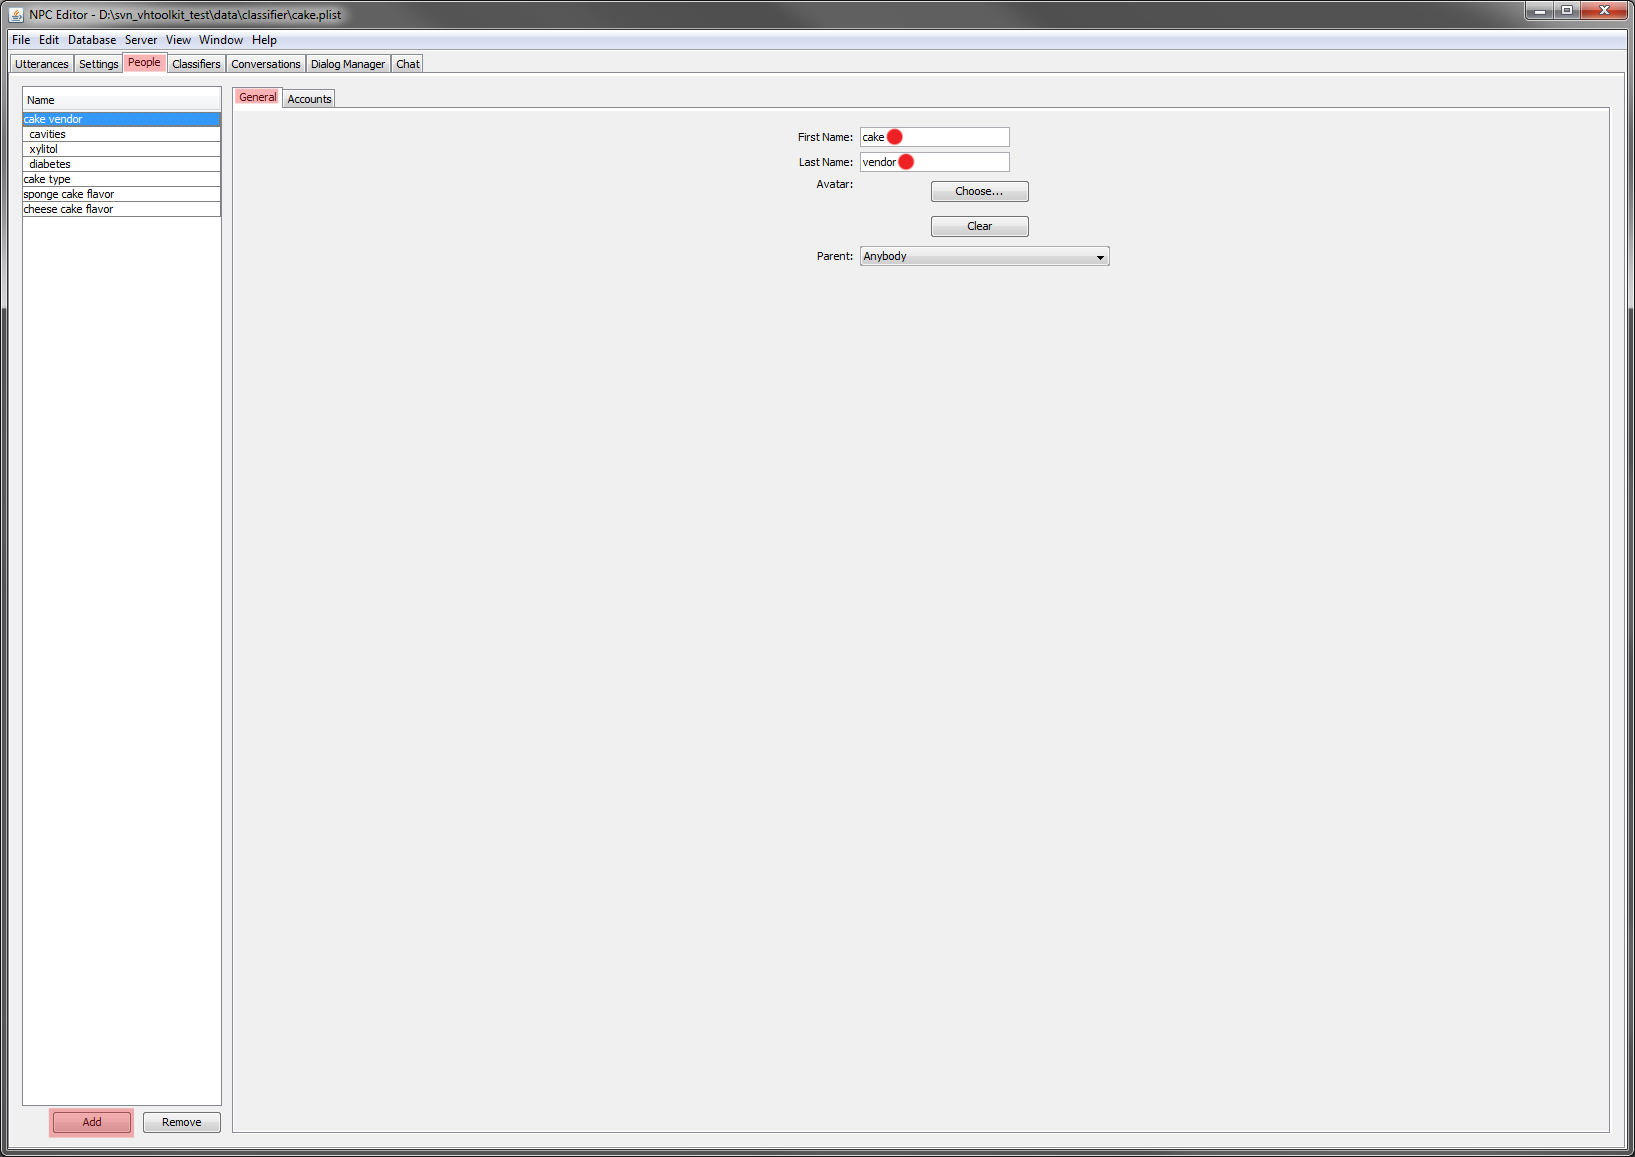
person created defines what NPCEditor calls a domain. Each domain is associated with a different classifier. A domain can work like a state in a dialog manager, we will see later how to define which utterances are defined in a particular domain and how changing domain (i.e. state) works. Make sure uInfo title A note on "People" in NPCEditor Each "person" in a plist represents a domain, which contains the list of answers the system chooses from. Domains can have inheritance, so for example greetings could always be accessible, while other details might only be available at specific points in a conversation. Make sure you set both 'first name' and 'last name' for your person. If your
domain/personperson/domain's name is just one word, you can set the last name or the first name to be a space or you can split the word into 2 parts, one for the first name and the other for the last name
.:, such as '
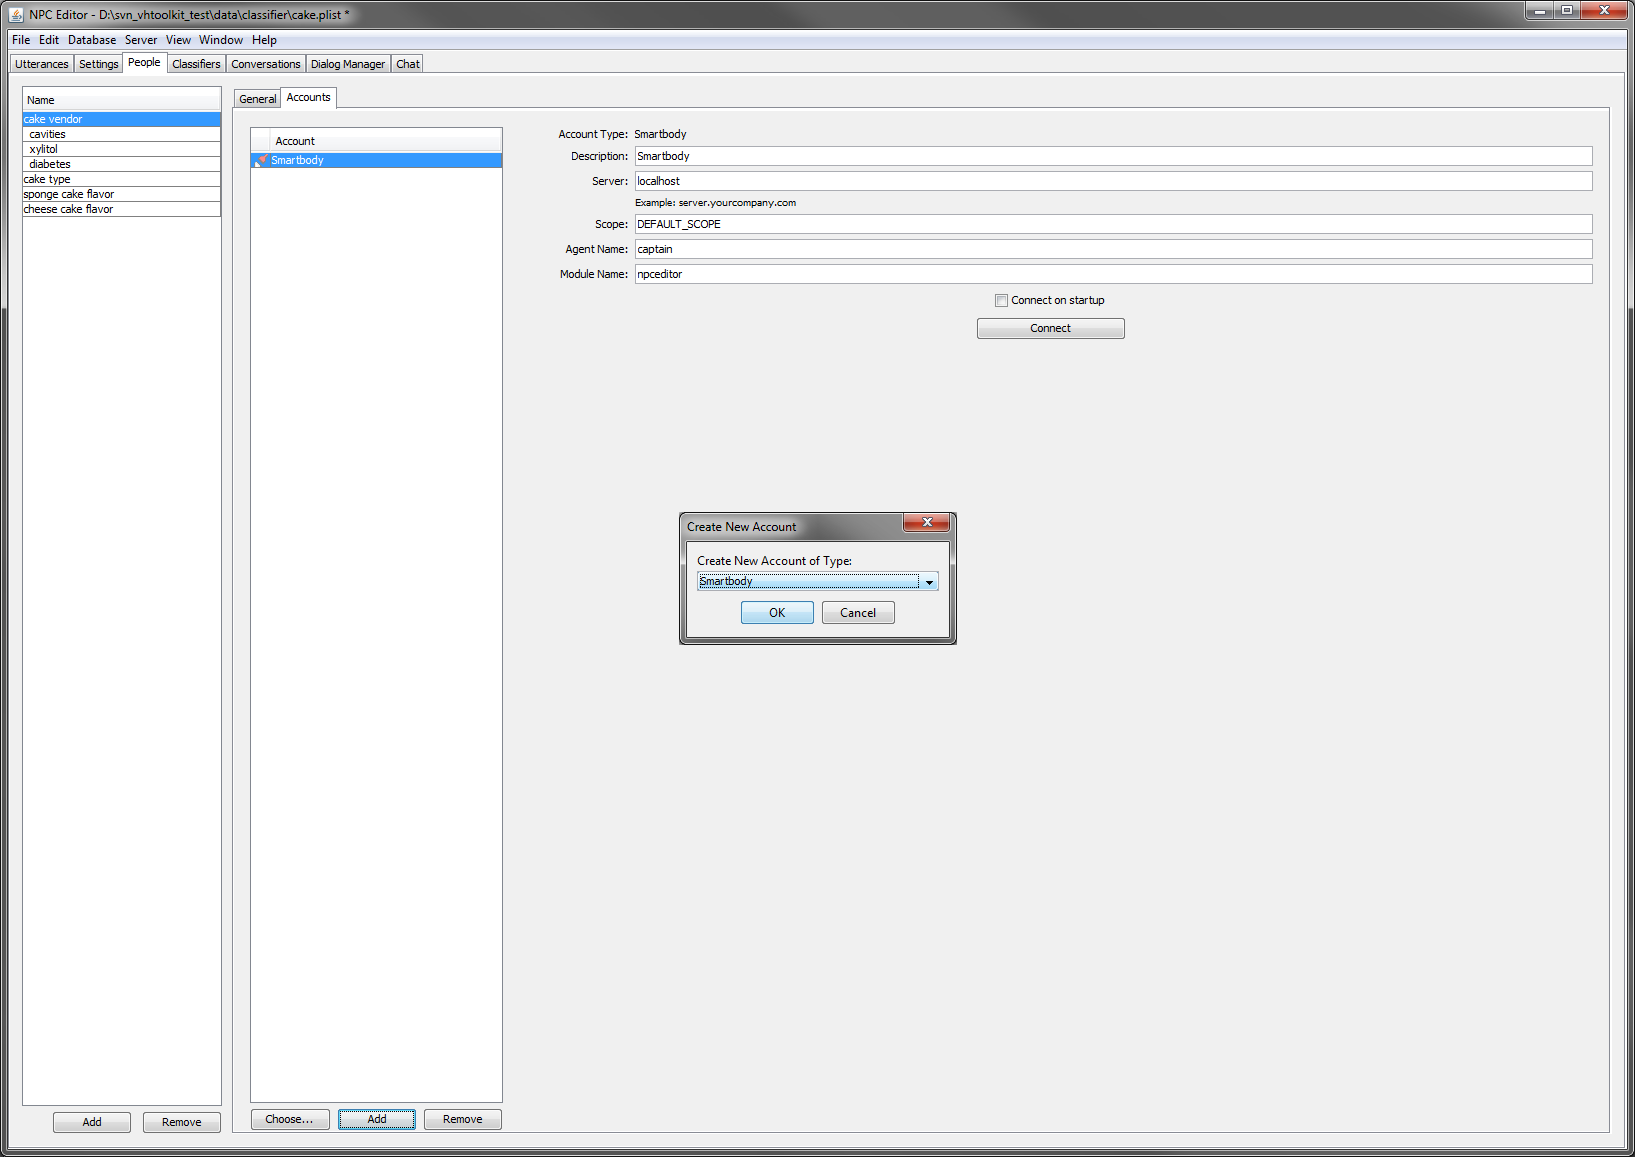
CakeVendor' or 'Cake Vendor' - Now define the connection NPCEditor uses to communicate with the rest of the Virtual Human Toolkit architecture. Select the 'Accounts' tab, then click on 'Add' and select 'Smarbody'. Test the connection by clicking on 'Connect': the button will change to 'Disconnect' and the row corresponding to the NPCEditor in the Launcher will become green. This should be defined once and associated only to one of the defined persons: the one that defines the initial domain
.
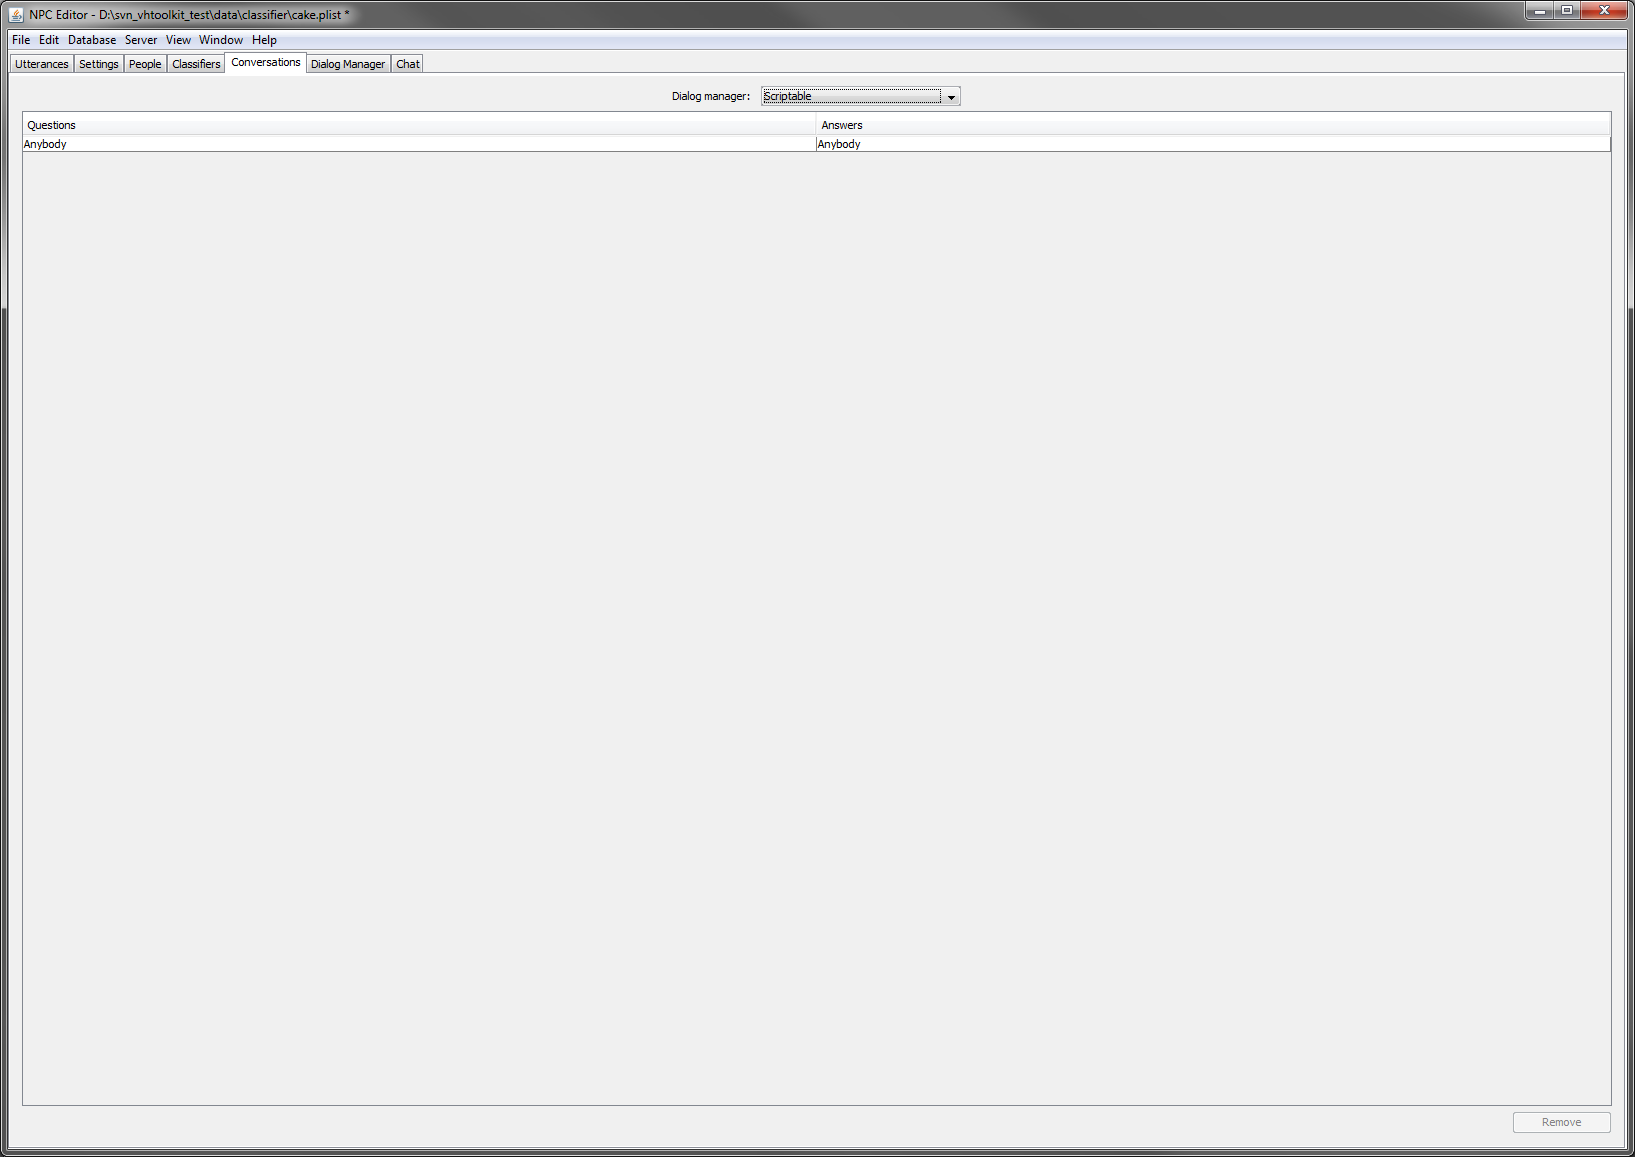 Next select '
scriptable' as the type of dialog manager 'scriptable' in in the 'Conversations' tab. A new 'Dialog Manager' tab next to 'Conversations' will appear containing an initial script for a dialog manager. The script is written in Groovy and can be edited to suit your needs.- Set the parent property of '
cake vendor' to 'Anybody' (default value). This step defines an inheritance hierarchy among the various domains. In this case the 'cake vendor' domain inherits the utterances defined for the 'Anybody' domain. - Create all the other persons defined in the dialog graph above: '
cavities', 'xylitol', 'diabetes', 'cake type', 'sponge cake flavor', 'cheese cake flavor'. Set the parent property of each of them to the 'Anybody' domain. - Create a 'type
Type' and 'speakerSpeaker' category in the 'Setting' tab. The first is used by the default dialog manager script to handle off topic utterances from the user. The second (speaker) needs to be set for proper communication with the rest of the modules in Virtual Human Toolkit. . Note that the DM uses the ID of a category for selection, so you need to change the autogenerated key to something unique, such as the Name, so Type's ID would be "Type".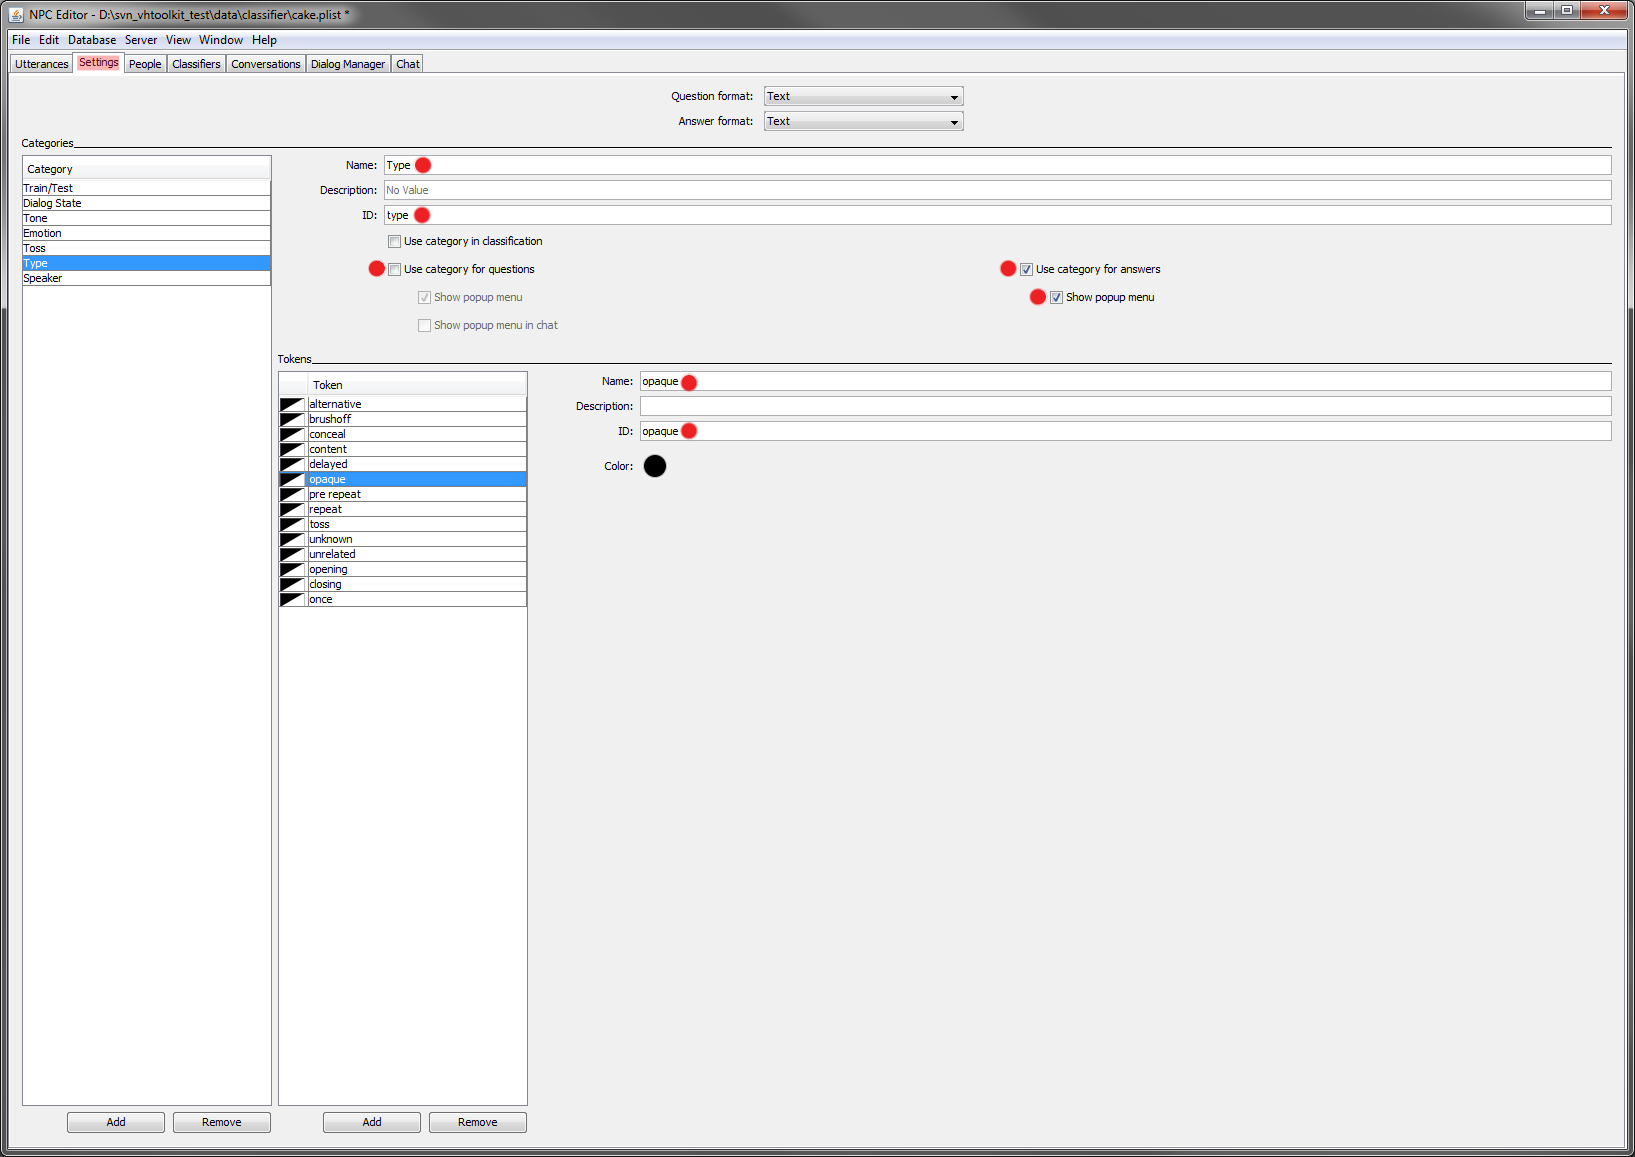
- Make sure the 'toss
Toss' category is set to be included in the answers and used by the classifier. The previous steps end This completes the setup, and we can move on to creating new content.
Adding Content to your Character
- Now from now on we will add the utterances we want the agent to understand and we will define the appropriate answers. To define the reply the agent will give when it doesn't understand what the user said; add a new answer and select the type to be '
opaque'. Then define an appropriate text (e.g. "iI didn't understand what you said, try to rephrase it"). For all answers you want the agent to be able to speak and animate, set the speaker to 'bradBrad'. 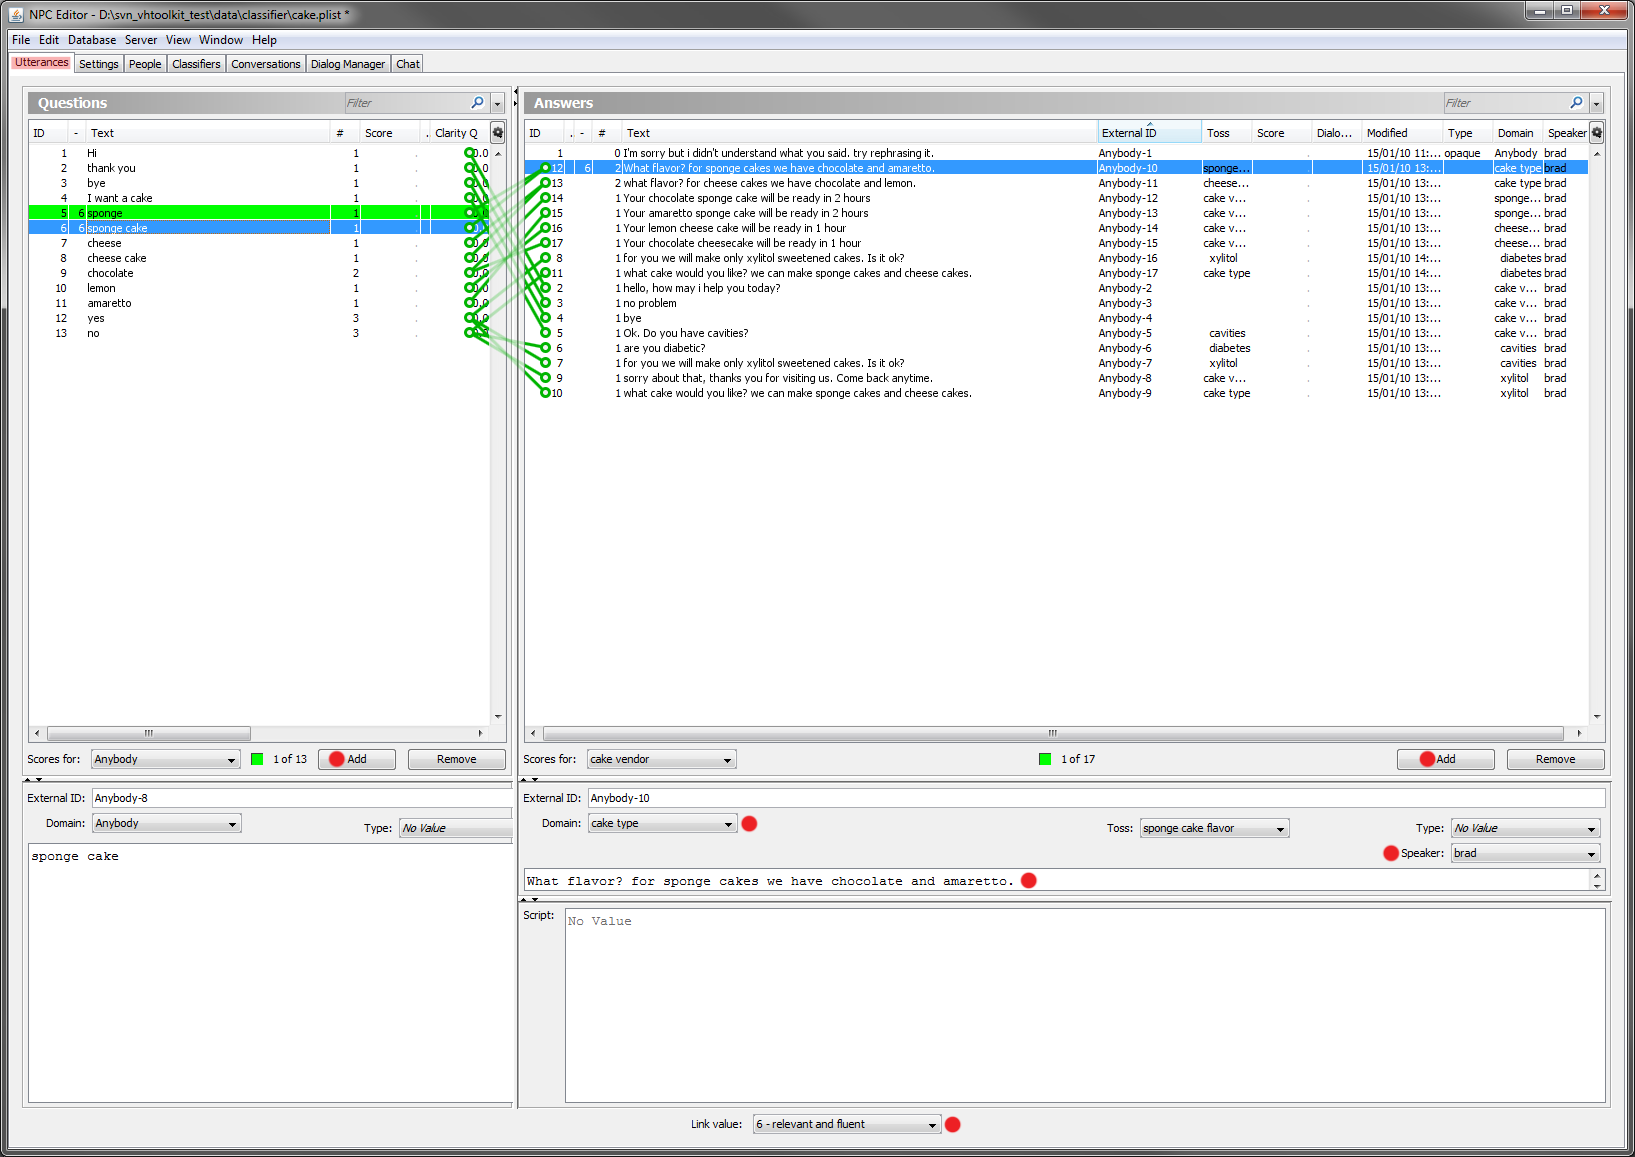 Next add the various utterances. The first defines your dialog. Each utterance should be the agent's answer to the a user's statement, such as '
Hi'. Here For the 'Hi' example, leave the type of the answer unset (because it's not an answer to be associated with non understanding, but an opening greeting). Set the speaker to 'bradBrad' as usual and the domain to 'cake vendor'. On the user pane (the left half) set , add a new utterance with the text to 'Hi'. Finally click on both newly added utterances (they both become blue) and then set the link strength to '6' to define specify that the one on the right should be the answer for the utterance on the lefttwo greetings are a question/answer pair. Similarly do for adding the replies for 'thank you' and 'bye'.- Now we will see how to make a change of state when the user says a particular utterance. We will change As an example of tossing from one domain to another, setup a toss from '
cake vendor' to 'cavities' when the user says that s/he wants to get they want a cake from the agent. To do so, in addition to the setup done for the other utterances in the previous step, just Add a new utterance as a resppnse, and set the toss property to the 'cavities' domain. - Follow this procedure and complete all steps as represented in the dialog graph given at the beginning. You can see also the complete cake.plist file.
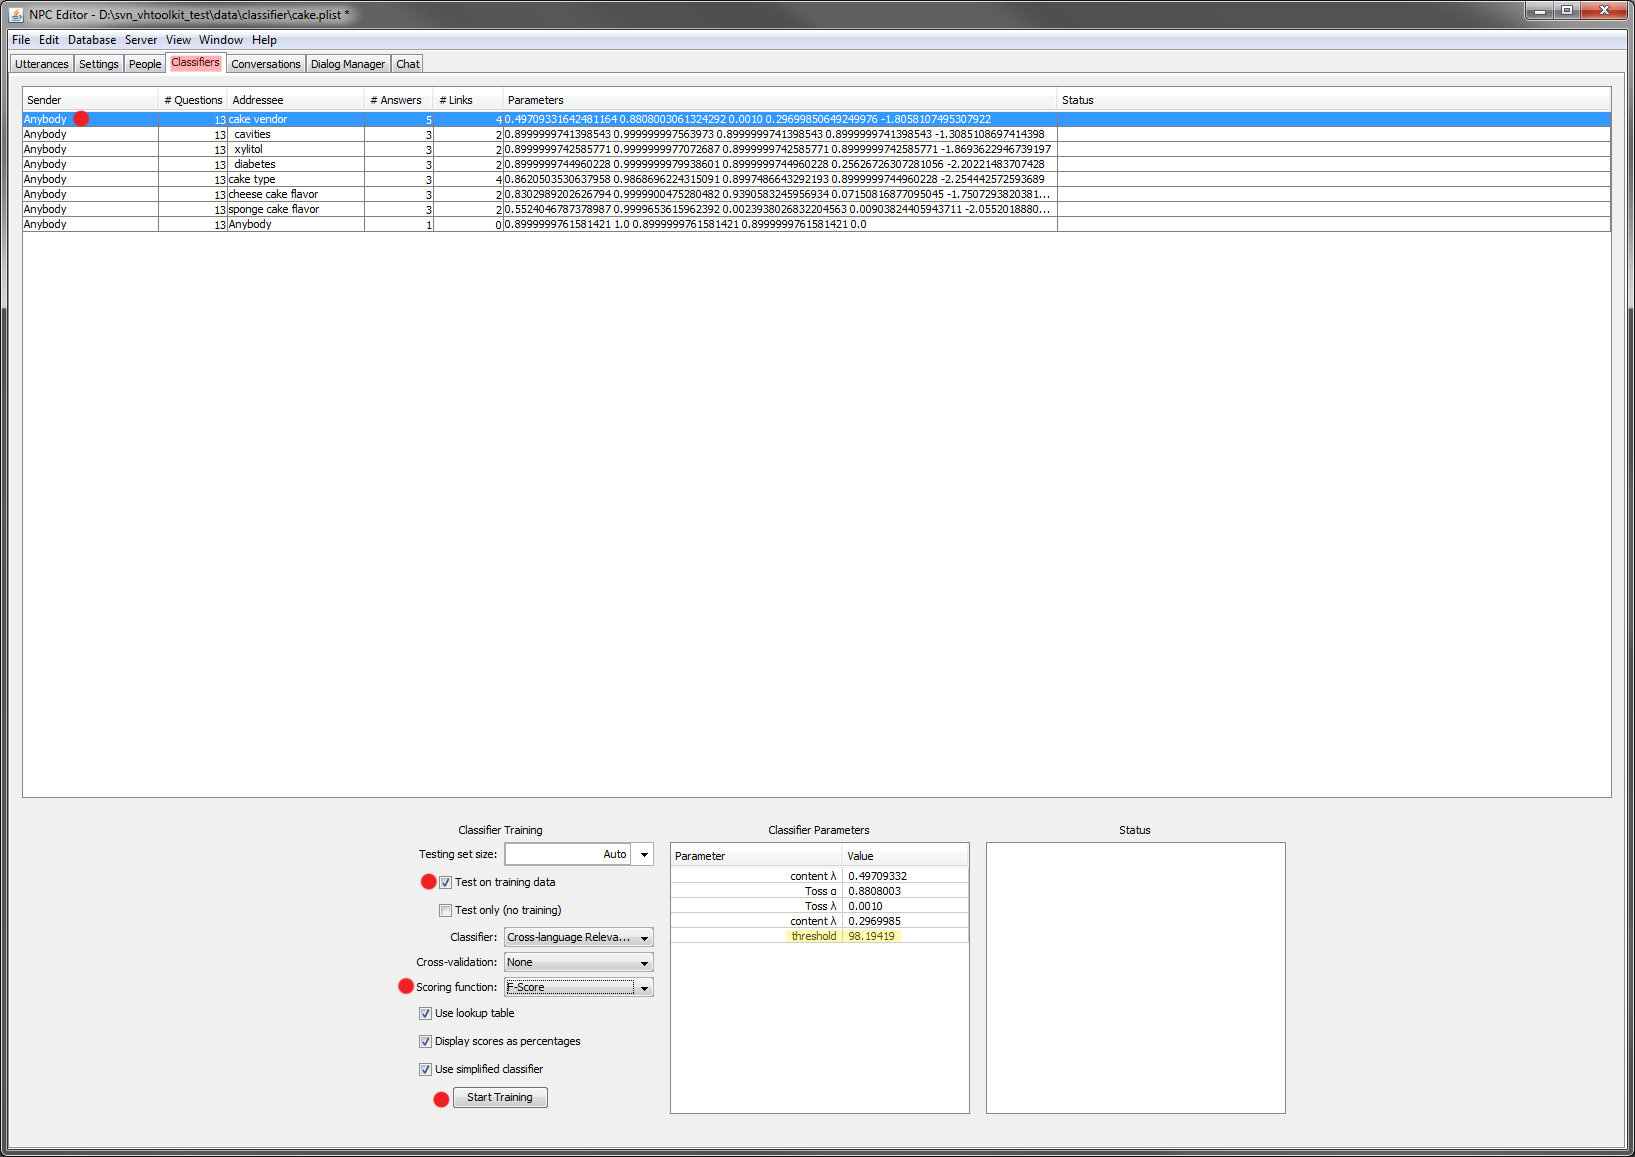 Before running the example, remember you will need to train the classifier. This analyzes the links between user and agent utterances, and defines how the agent will respond. Select all the rows in the table in teh the tab 'Classifiers'. Then check the box 'Test on training data' (because the training data is too small to be split) and then click on 'Start Training'. You can change the optimization criteria. Also, in this example, the '
Anybody' classifier will fail because it contains no links to learn between user utterances and system answers.- :If during the testing of the example , you see that the classifier returns multiple answers instead on just the correct one, you can adjust the threshold of that classifier by selecting the classifier in question and double-clicking the threshold displayed, as seen in this screen capture:.
Making The New Example The Default One
After creating a new example and saving the . plist file, to make it load automatically every time the NPCEditor is started from the Virtual runs, you'll need to edit the config for theVirtual Human Toolkit launcher is sufficient to modify . Editing the NPCEditor launching launch script that is found in svn_vhtoolkit/trunk/tools/launch-scripts/run-toolkit-npceditor.bat and then re-compile vhtoolkit.sln. If , or, if you want to make this change without having to re-compile, edit the file bin/launcher-scripts/run-toolkit-npceditor.bat.
In that script change the pointer from the default plist file to your new plist file. Also consider setting set the option 'Connect at startup' in the 'People' tab for the person/domain associated with the Smartbody connection.
Note On When The Toss To A New Domain
...
Occurs
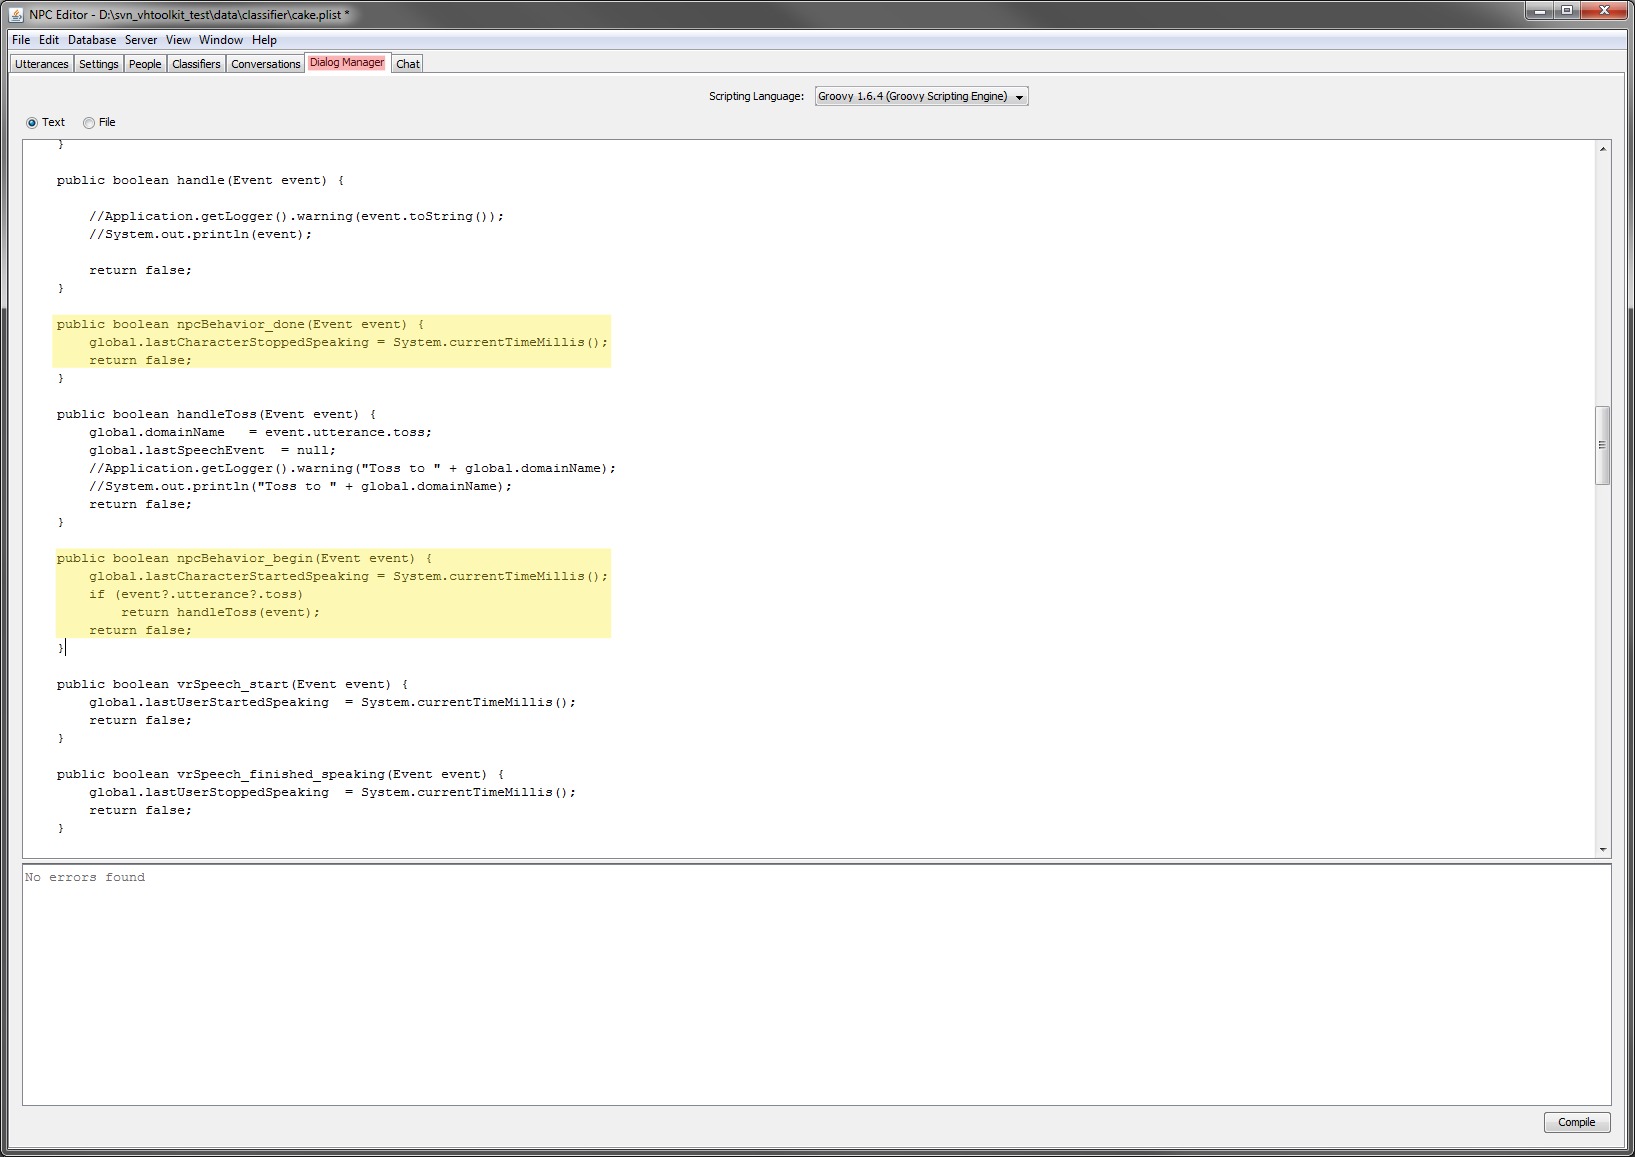
The tossing to a new domain is decided in the dialog manager script (that can be seen in the dialog manager tab).
The default script tosses after the character has finished saying speaking the utterance (finished=both sound and animation are done, sometime these can be out of sync).
This may complete utterance. This can cause problems when the user doesn't wait for the character to finish its utterance before submitting the next user's utterance (because the domain will not be yet correctly set when the new user's utterance comes in).interrupts the agent, as their question will still be in the first domain. To modify the default behavior and move the tossing toss from the end of the utterance to the beginning of the utterance, move the two selected lines from the method npcBehavior_done to the method npcBehavior_begin as displayed in the following image:
Note On Debugging
...