Page History
Overview
The purpose of the virtual human authoring tool is to be a complete UI interface for authoring characters easily, editing behaviors and adding/recording dialog.
Using the vhBuilder:
Loading an existing scenario
- Launch the vhBuilder application. It will load up with a message ' Please Create/Load a scenario' as shown below
...
7) Once Unity loads up with the characters, then you can begin interacting with the characters just as you always do. The characters will respond to the questions with the answers as they are linked.
Creating a new scenario
- Launch the vhBuilder application. It will load up with a message ' Please Create/Load a scenario' as shown below
...
5) As indicated by the 'red' button on the bottom left, you now need to hit 'Apply' in order to have the scenario setup. On doing this, the tool will create a language model, classify the NPCEditor and initialize NVBG with the current scenario. On doing this, the new scenario is set up.
Editing a scenario
Once you have loaded a scenario or created a new one, you can modify the character dialogues and their behavior using the tool directly. This can be done as shown below
Adding a question and answer and linking them
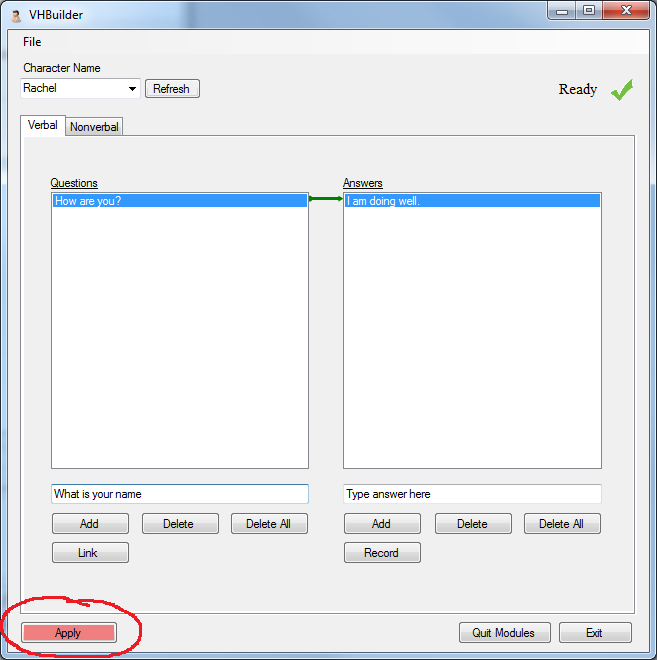
1) In order to add a question/answer, first select the character that you want to add questions/answers for, from the character drop-down menu on the top left. Then type the question/answer in the respective text-box and hit enter or the 'Add' button as shown below. This will add the question/answer.
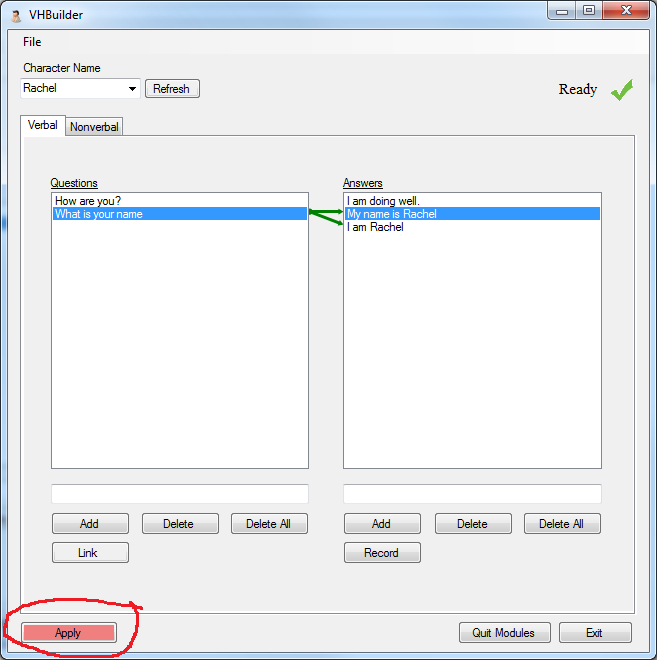
...
3) Once you are done adding and linking questions/answers, hit the apply button on the bottom left as indicated by it's red color. This will apply your changes in NPCEditor.
Recording the audio for an answer
1) In order to record audio for a newly added answer, first select the answer by clicking on it. This will highlight the answer. Now hold down the 'Record' button and speak into the microphone and release the button when you are done speaking.
...
2) On releasing the 'Record' button, you will see a window popup as shown below. This generates the bml with the lipsynch for the audio you just recorded. Please wait until the tool indicates otherwise. Once the tool indicates it is done, the audio has been recorded and the lipsynch generated. You should now be able to ask the corresponding question and hear the character respond in the recorded voice.
Modifying the character behavior
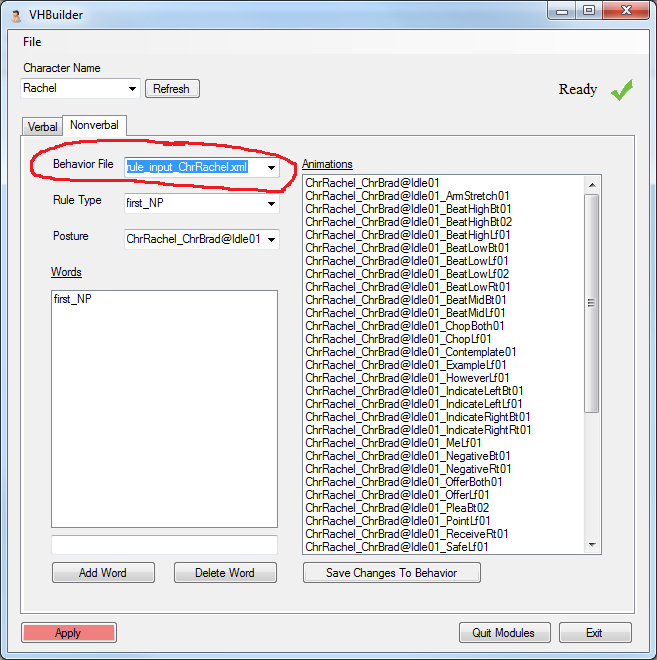
1) In order to modify the character behavior, please select the 'Non-Verbal' tab as shown below.
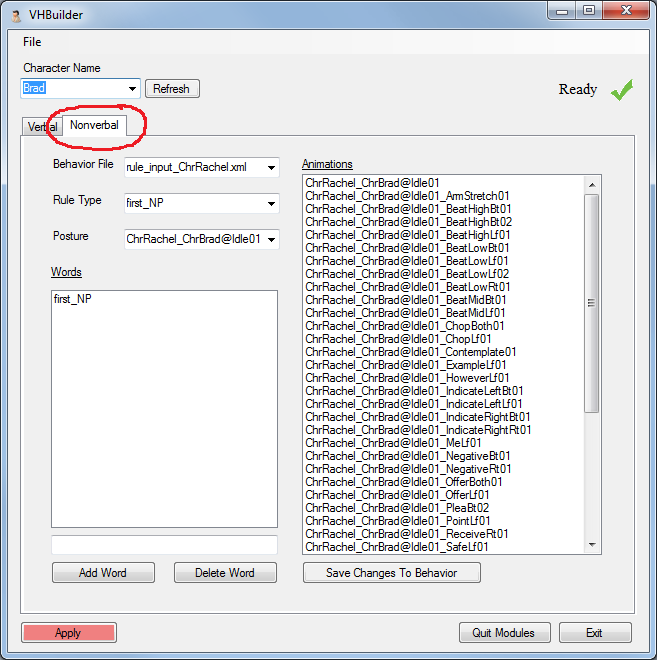
2) For each character, you can select the 'behavior file' that you want to use for that character. e.g. in the example below, we have selected 'rule_input_ChrRachel.xml' for the selected character 'Rachel'. As you can see, on selecting a rule file, the Animations section gets filled with the animations available for that character. Once you select the behavior file for a character, the tool will remember it.
3) In order to modify a rule, you select the 'Rule Type' and the posture that you want the rule to apply to. Now you can add words that will trigger this rule under the 'Words' section by typing the word in the text-box and hitting the enter key or the 'Add' button. You are also able to select the animations that will be triggered when the character speaks that particular word, by clicking on the animation name.
Notes:
a) The character only performs the animation when the word is spoken and he is in the specified posture.
b) You can select multiple animations by holding down the 'ctrl' key and clicking on them.
c) If you have Unity running with the characters loaded, you can double click on the animations and see how they play on the character.
d) At any time, you can hit 'R' on the 'Animations' box and it will reset to the original selected animations.
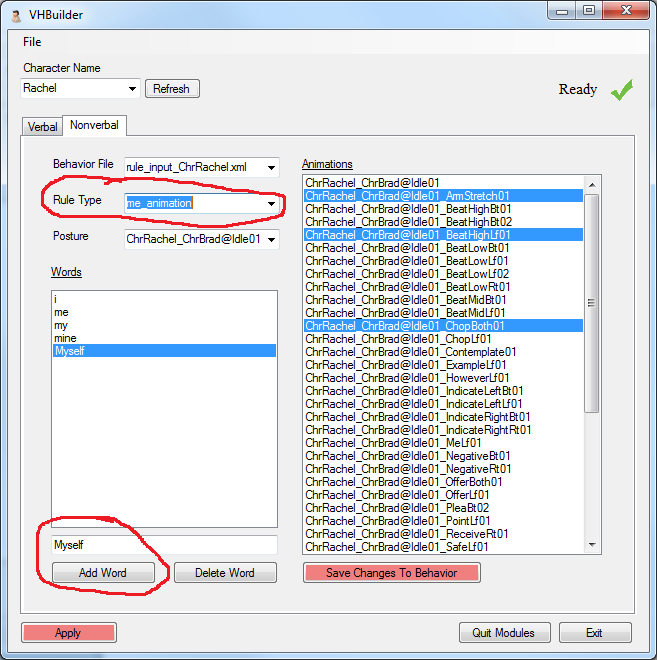
3) Once you are done adding the words and selecting the animations,
a) Hit the 'Save Changes To Behavior' button as indicated below. This will save the changes you made to the behavior file.
b) Then hit 'Apply'. This will configure NVBG.
On doing this, the character behavior has been applied. Now when the character speaks that particular word, he will perform one of the selected animations.

Saving the scenario
1) In order to save the scenario and all the changes made to it, select the File menu option and hit the 'Save Scenario' as shown below
