Overview
VHBuilder is a tool that allows you to quickly author verbal and nonverbal behaviors for one or more characters. It's purpose is to be a complete UI interface for authoring characters, editing behaviors and adding/recording dialog easily. It is aimed at quickly getting basic characters up and running; power users can then move on to using the NCPEditor or NVBG directly for more fine-grained control.
It abstracts the end user from individual components of the Toolkit pipeline and offers a go to place for easy authoring of characters.
Quick facts:
- Location: /tools/VHBuilder (latter for public Toolkit site)
- Language: C#
- Distribution: source
- Platform(s): Windows
Users
Creating a new scenario
The VHBuilder application requires the user to either create or load a scenario before authoring the virtual human characters. A scenario is basically a sandbox which includes all the files and data associated with it.
Launch the VHBuilder application from the corresponding tab in the launcher. It will load up with a message ' Please create or load a scenario'.
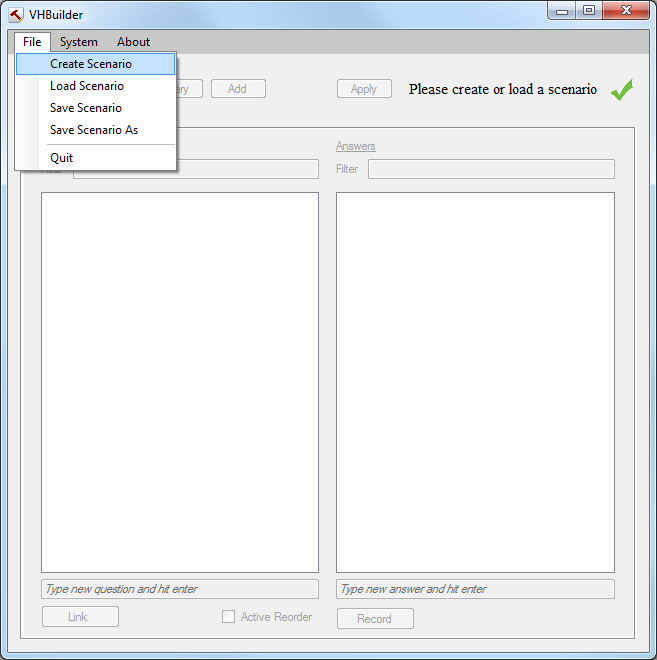
Click on the File menu option on the top left and select the 'Create Scenario' option as shown below
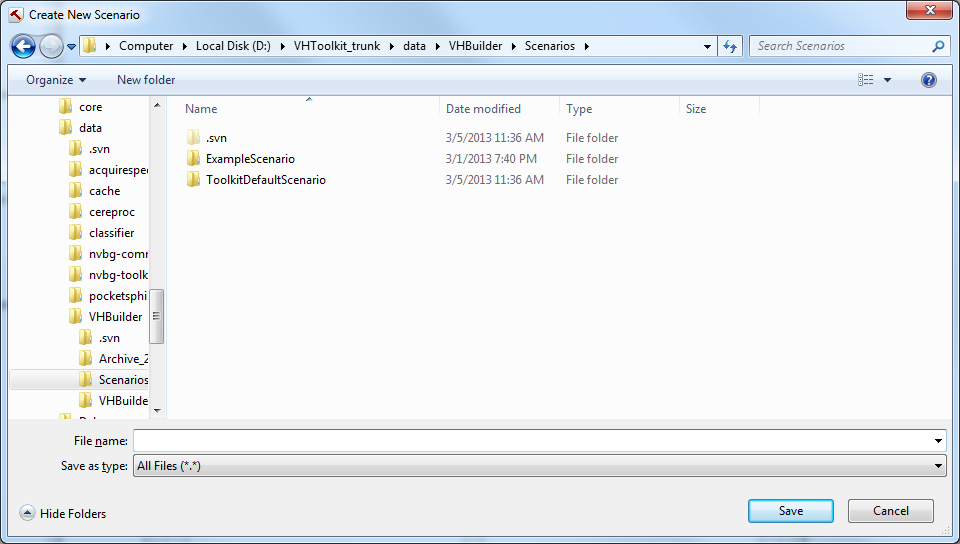
On selecting the 'Create Scenario' option, you will be presented with a dialog as shown below. Please type in the name of the new Scenario you want to create, select where you want to create it and select 'Save' as shown. On hitting 'Save' above, it will create a scenario and it will also launch all the components required to create the new scenario.
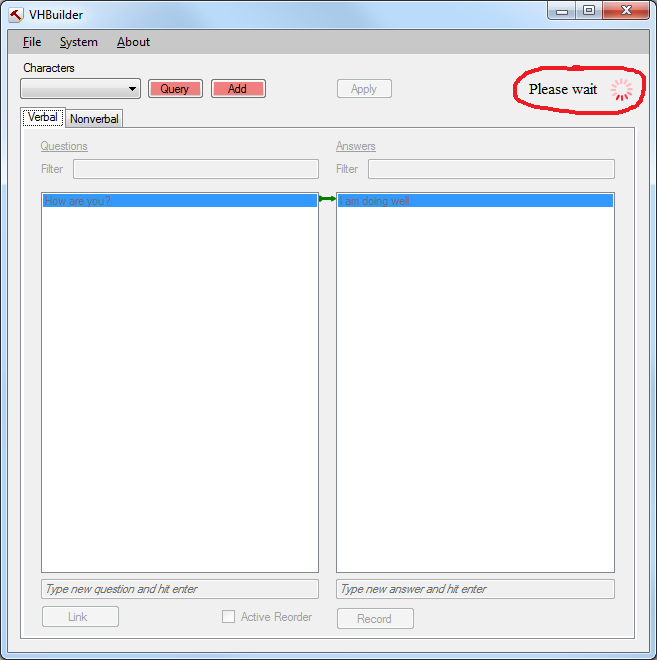
On creating the scenario, the VHBuilder tool will launch all required components and while it is doing so, it will indicate that background processes are running, using the indicator on the top right (as shown below)
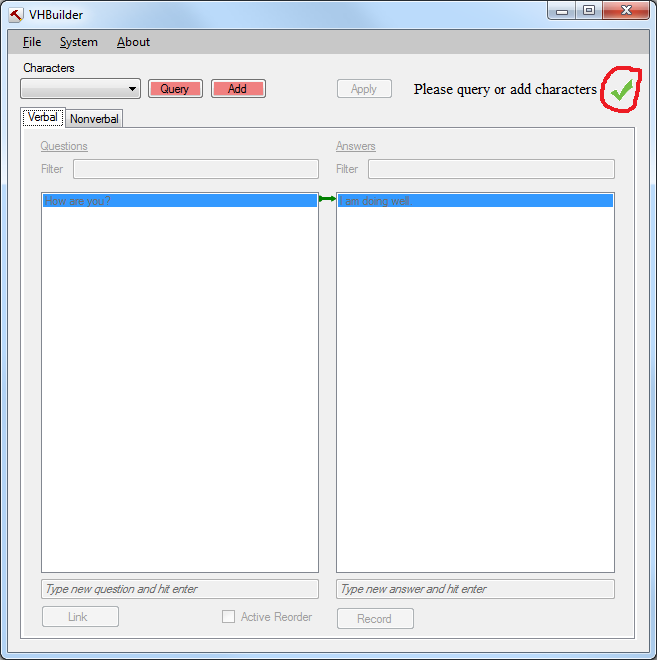
Once it is done loading the scenario, it will indicate that it is ready, again using the indicator on the top right as shown below.
Adding/Querying characters to the scenario
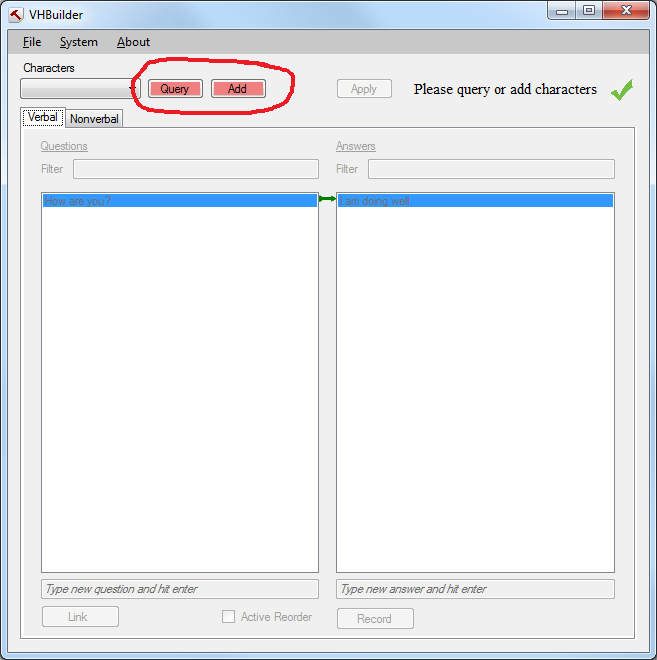
You cannot begin editing the scenario unless you add new characters to the scene. In order to do this, you can use either the 'Query' or 'Add' button as shown below.
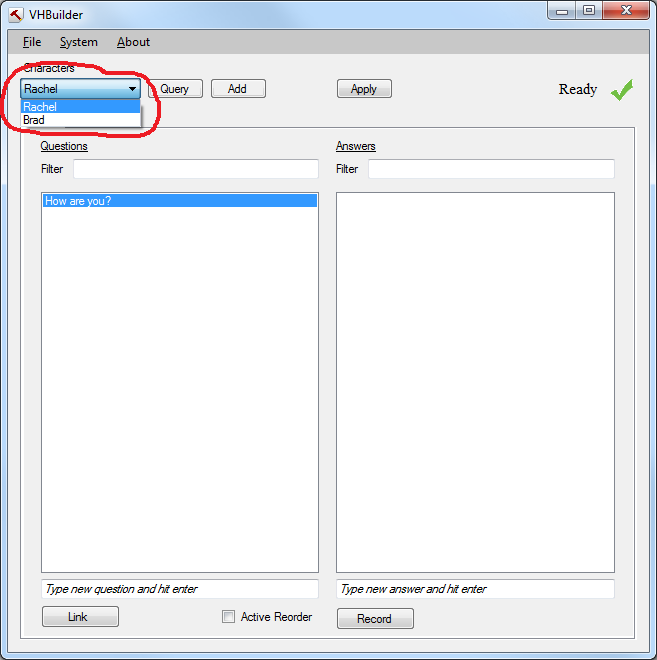
The 'Query' button works only if you have an instance of Unity running in the background with a scene consisting of Toolkit characters. The 'Query' button basically queries Unity for the characters that are currently loaded and it adds these characters to the VHBuilder's list of characters as shown below.
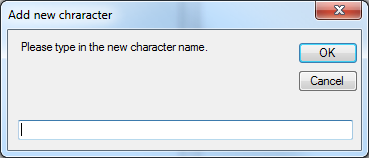
If you don't have a Unity instance running, another way to add the characters is hitting the 'Add' button next to the 'Query' button. This will pop up a window as shown below
You can type in the name of the character you want to add and it will get added to the VHBuilder's list of characters just like the 'Query' button does.
Applying changes
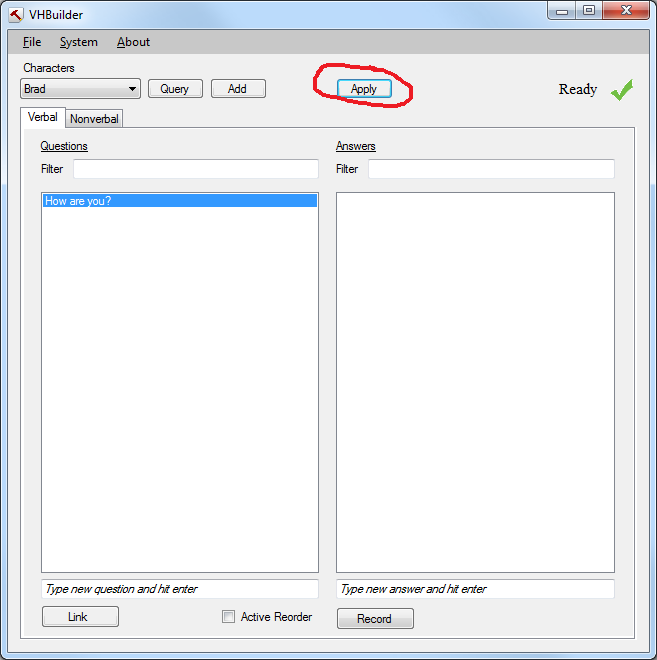
You need to hit the 'Apply' button in order to apply the changes that you make (characters, questions, answers, behaviors etc.). On hitting the 'Apply' button, the tool will create a language model, classify the NPCEditor and initialize NVBG with the current scenario. Every time you make a change to the scenario, the Apply button will turn red as a reminder that you need to press it to see your changes.
Adding a question and answer
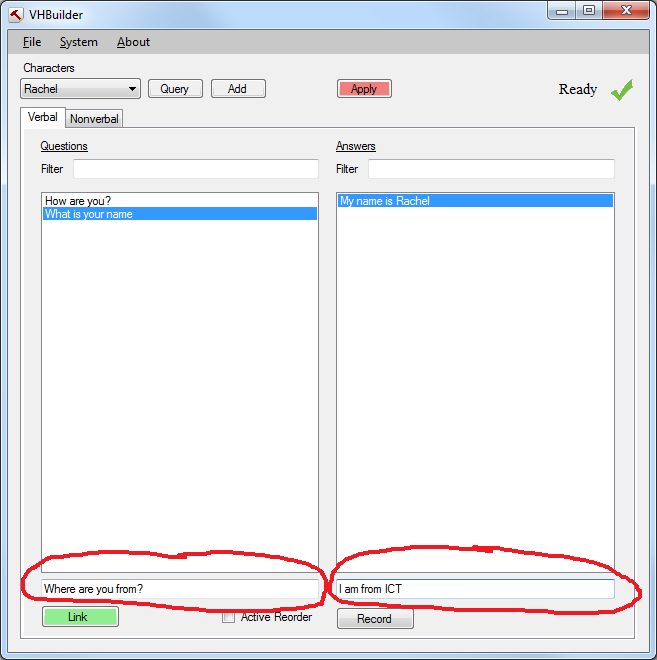
In order to add a question/answer, first select the character that you want to add questions/answers for, from the character drop-down menu on the top left. Then type the question/answer in the respective text-box and hit enter. This will add the question/answer.
NOTE: The newly added answer is spoken by the character that is currently selected in the CharacterCombo box on the top left. e.g. in the image below, 'Rachel' is the currently selected character, so any answer that is entered will be spoken by her.
Linking a question to an answer
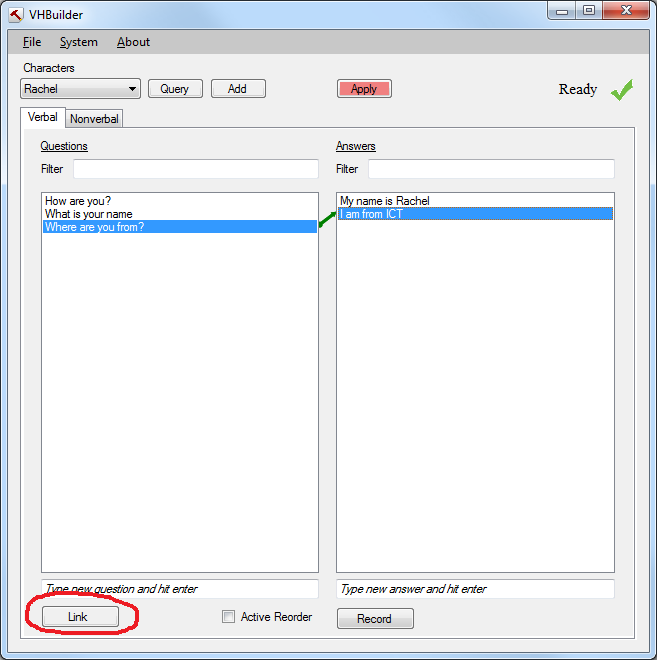
Once you have added the question and answer, you can link them together by selecting them and clicking the 'Link' button as shown below. You can select multiple questions and answers at the same time and link them as shown.
Recording the audio for an answer
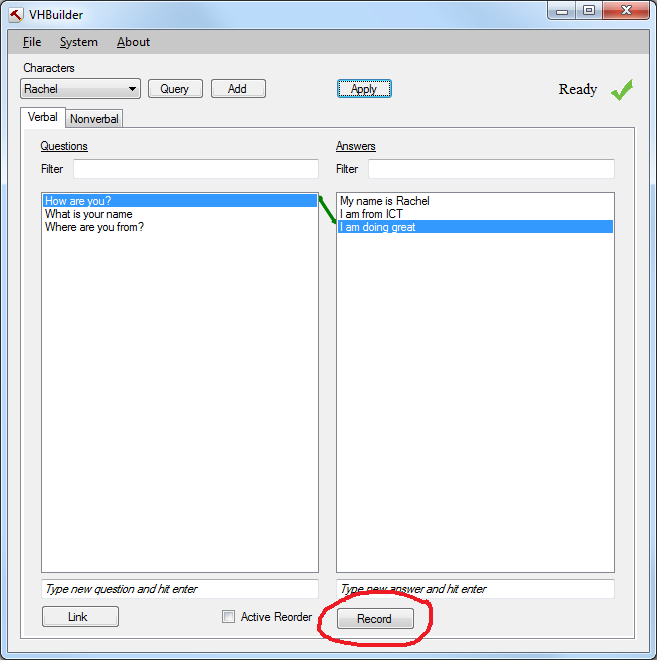
In order to record audio for a newly added answer, first select the answer by clicking on it.This will highlight the answer. Now hold down the 'Record' button and speak into the microphone and release the button when you are done speaking.
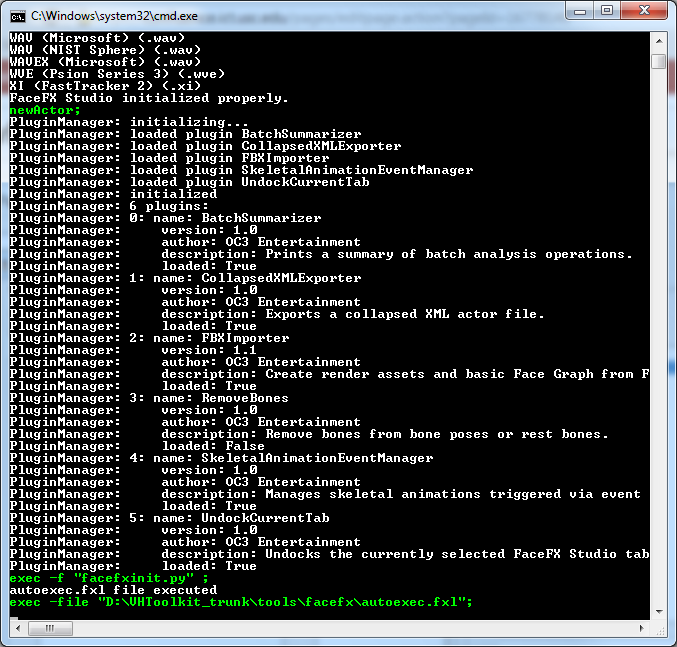
On releasing the 'Record' button, you will see a window popup as shown below. This generates the bml with the lipsync for the audio you just recorded. Please wait until the tool indicates otherwise. Once the tool indicates it is done, the audio has been recorded and the lipsync generated. You should now be able to ask the corresponding question and hear the character respond in the recorded voice.
In case you don't have FaceFx installed on your machine, the window you see will look different as VHBuilder will default to using the VisemeSchedulerSOX tool instead which is our in-house tool for generating basic lipsync.
Selecting NVBG behavior files
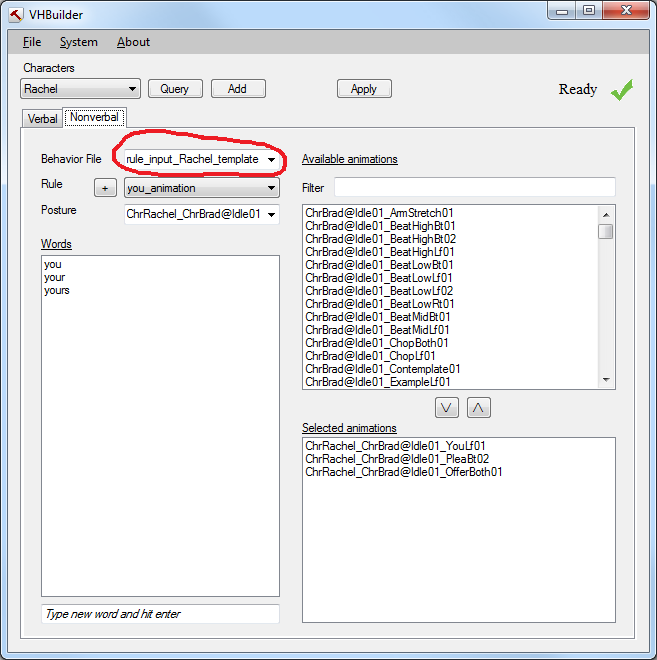
A 'behavior file', contains the mapping from the spoken words to animations. For each character, you can select the 'behavior file' that you want to use for that character from the list of available files in the drop-down list. e.g. in the example below, we have selected 'rule_input_Rachel_template.xml' for the selected character 'Rachel'. Once you select the behavior file for a character, the tool will remember it.
Modifying behavior rules
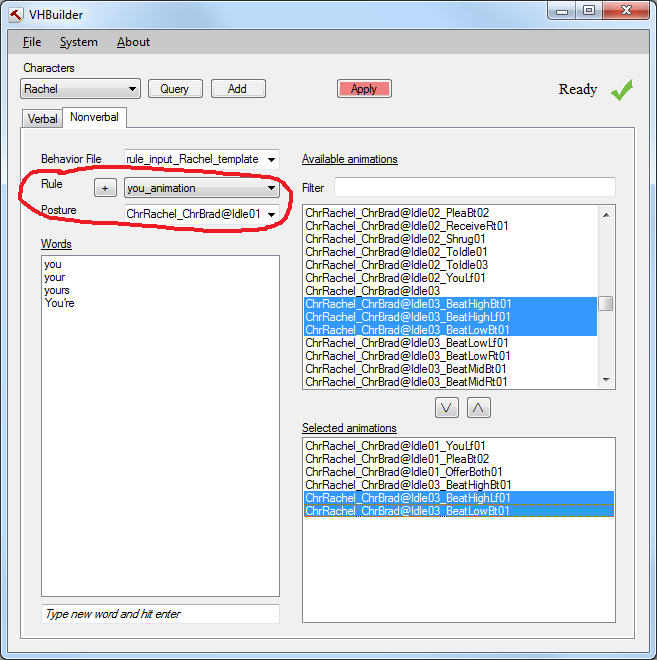
In order to modify a behavior rule, you select the 'Rule' that you want to modify and the 'Posture' that you want the rule to apply to, using the drop-down lists as shown below. The drop-down list will contain the available rules and postures for the character.
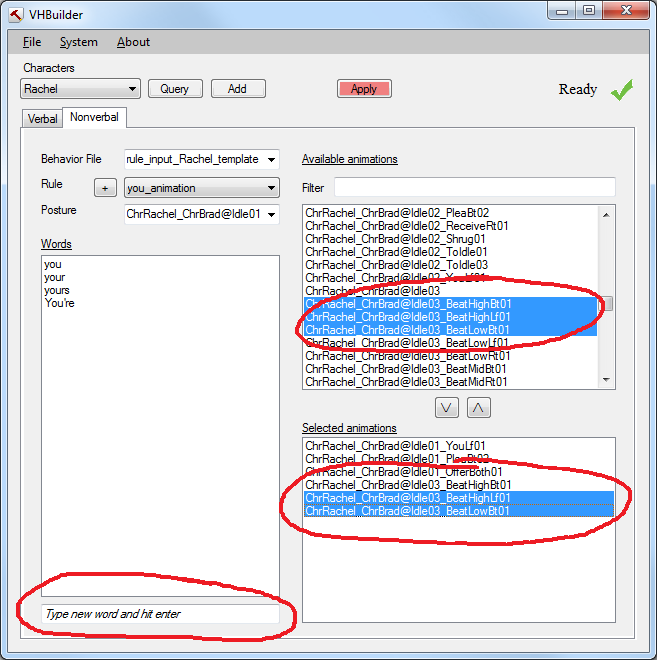
Now you can add words that will trigger this rule under the 'Words' section by typing the word in the text-box and hitting the enter key. You are also able to select the animations that will be triggered when the character speaks that particular word, by clicking on the animation name and selecting it. The list of selected animations for a particular rule is displayed in the bottom right as shown.
Notes:
a) The character only performs the animation when the words in the 'Words' list are spoken and he is in the specified posture.
b) You can select multiple animations from the 'Available animations' list by holding down the 'ctrl' key and clicking on them.
c) If you have Unity running with the characters loaded, you can double click on the animations (or select a posture) and see how they play on the character.
d) You can select and hit enter to add animations and hit delete in the 'Selected Animations' list to remove animations.
Adding a new behavior rule
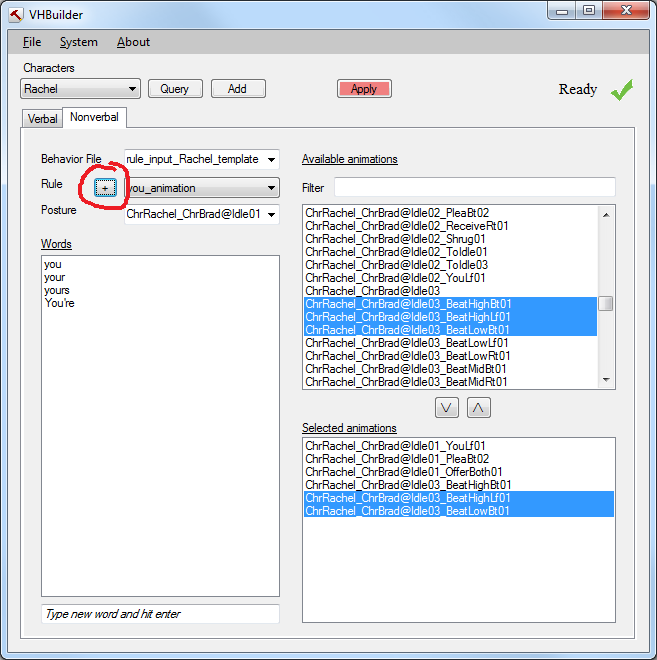
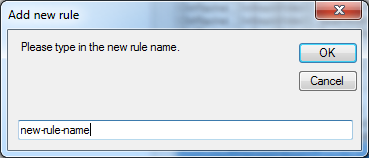
You can add a new rule by hitting the '+' button next to the Rule drop-down list. This will pop up a dialog box as shown below.
Enter the name of the new rule. Hitting OK, will create a new rule and you can go ahead and add words to this rule and select animations for it. Rule names are mostly for organizational purposes allowing you to have different rule names for different set of words.
Loading an existing scenario
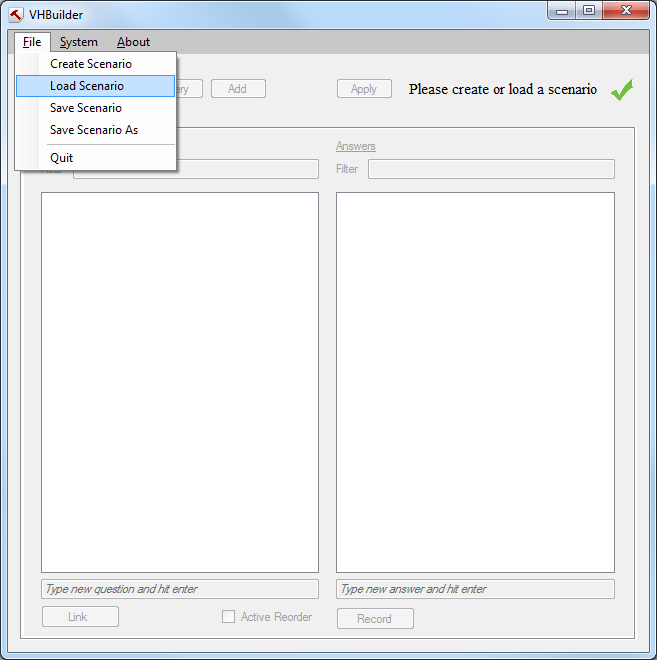
Click on the File menu option on the top left and select 'Load Scenario' as shown
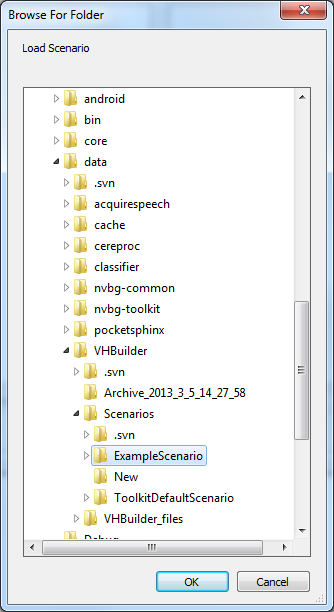
A dialog box will pop up as shown below prompting you to select an existing scenario. Select a previously saved scenario folder to load up an existing scenario. e.g. In the toolkit trunk, under data/VHBuilder/Scenarios, there is an existing scenario called ExampleScenario. Select the scenario you want to load
On selecting the example scenario and clicking 'OK', you should see a few windows show up and minimize. This should include the NVBG, NPCEditor, VHTSpeechRecorder, AcquireSpeech, ElvinParser, PocketSphinx-sonic-server and TTSRelay.
During this interval, the tool should indicate that it is busy loading. It does this using a 'wait' image on the top right as shown below
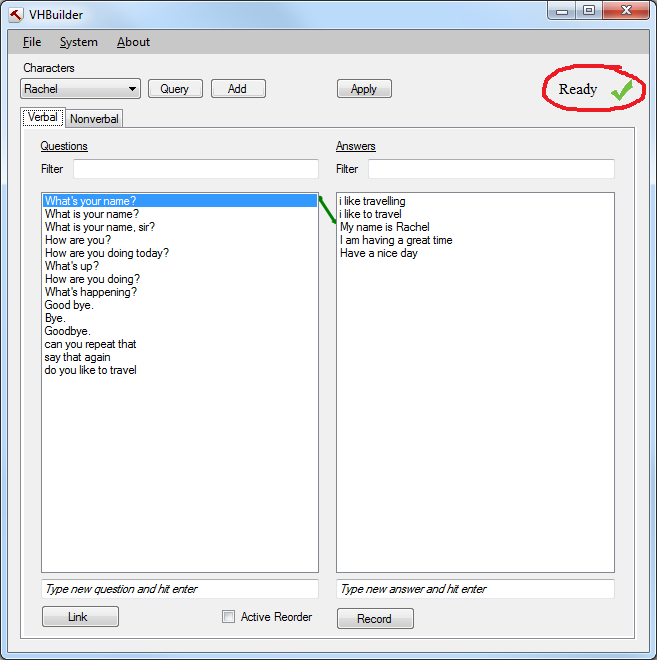
Once the scene is loaded and all the components are initialized, the tool will indicate that it is ready as shown below.
At this point, the scene has been loaded and you can begin interaction with the characters. Note that currently the tool does not load up the characters in Unity automatically (yet to be implemented). So you will have to open up an empty scene in the Unity editor (e.g. CampusEmpty) and drag the listed characters in the scene and hit play in Unity. The characters that are in the scene can be seen in the combo-box as shown below. Once Unity loads up with the characters, then you can begin interacting with the characters just as you always do. The characters will respond to the questions with the answers as they are linked.
Saving the scenario
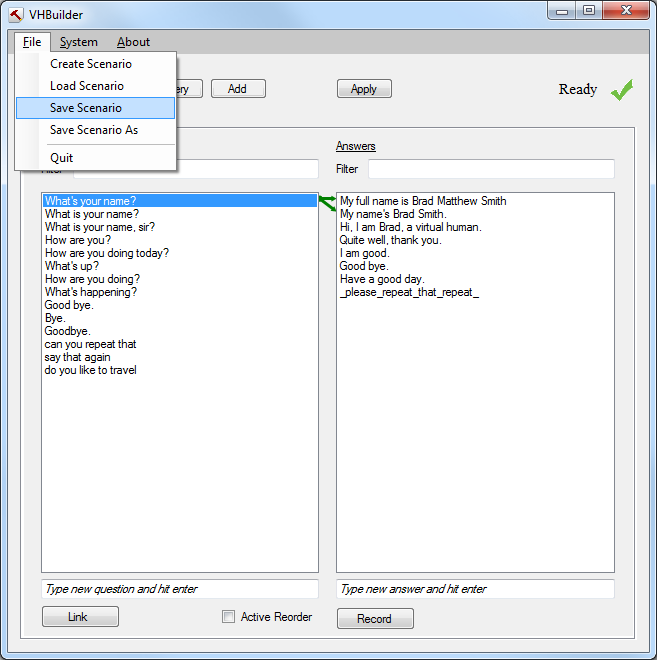
1) In order to save the scenario and all the changes made to it, select the File menu option and hit the 'Save Scenario' as shown below
Developers
Pinging background components
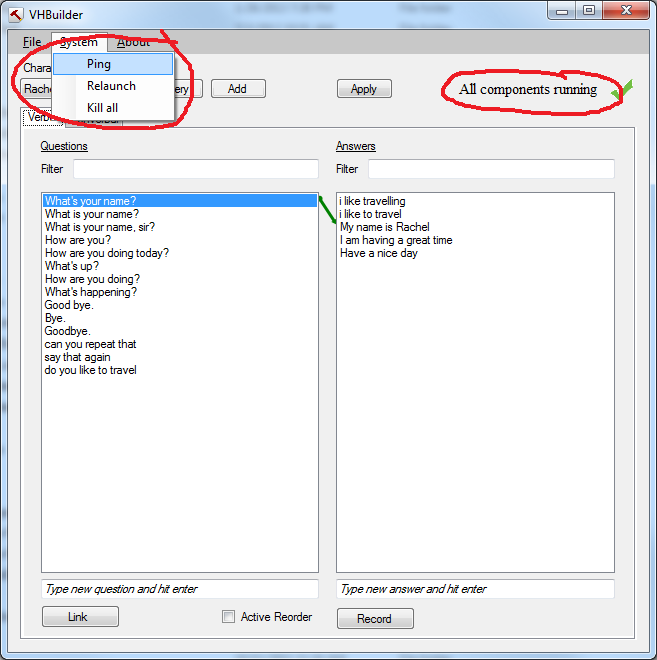
In case of unexpected functionality, a good way to check if all background components are functioning is to ping them and make sure they are running. This can be done using the 'Ping' menu option. If all components are running fine, then the VHBuilder tool will indicate so. If any component is missing, then you will be notified of this.
Relaunching background components
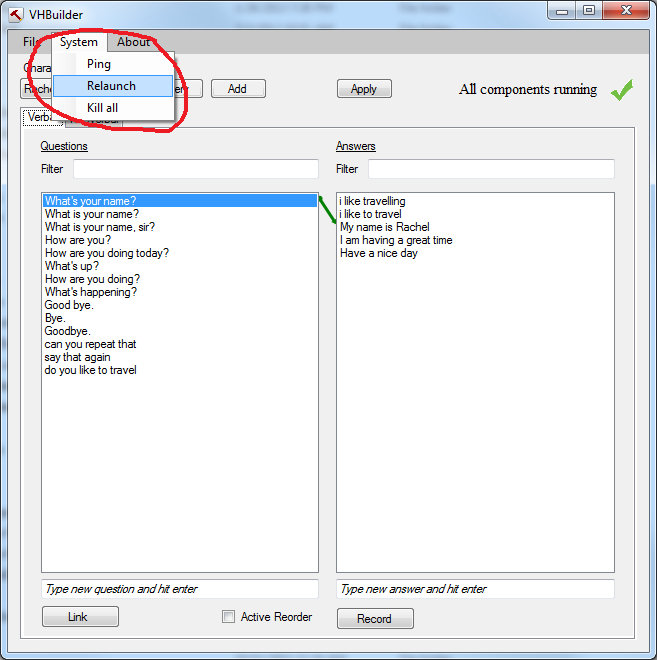
If for any reason, one of the components fails to function or exits you can relaunch the components using the 'Relaunch' menu option as shown below. This can be used to restart the system with all components functioning in the background.
